How to Configure an External Storage
View the List of External Storages
- Sign in to Flywheel as a Site Admin.
- Click Interfaces in the left menu under the ADMIN section.
- Click the External Storages tab.
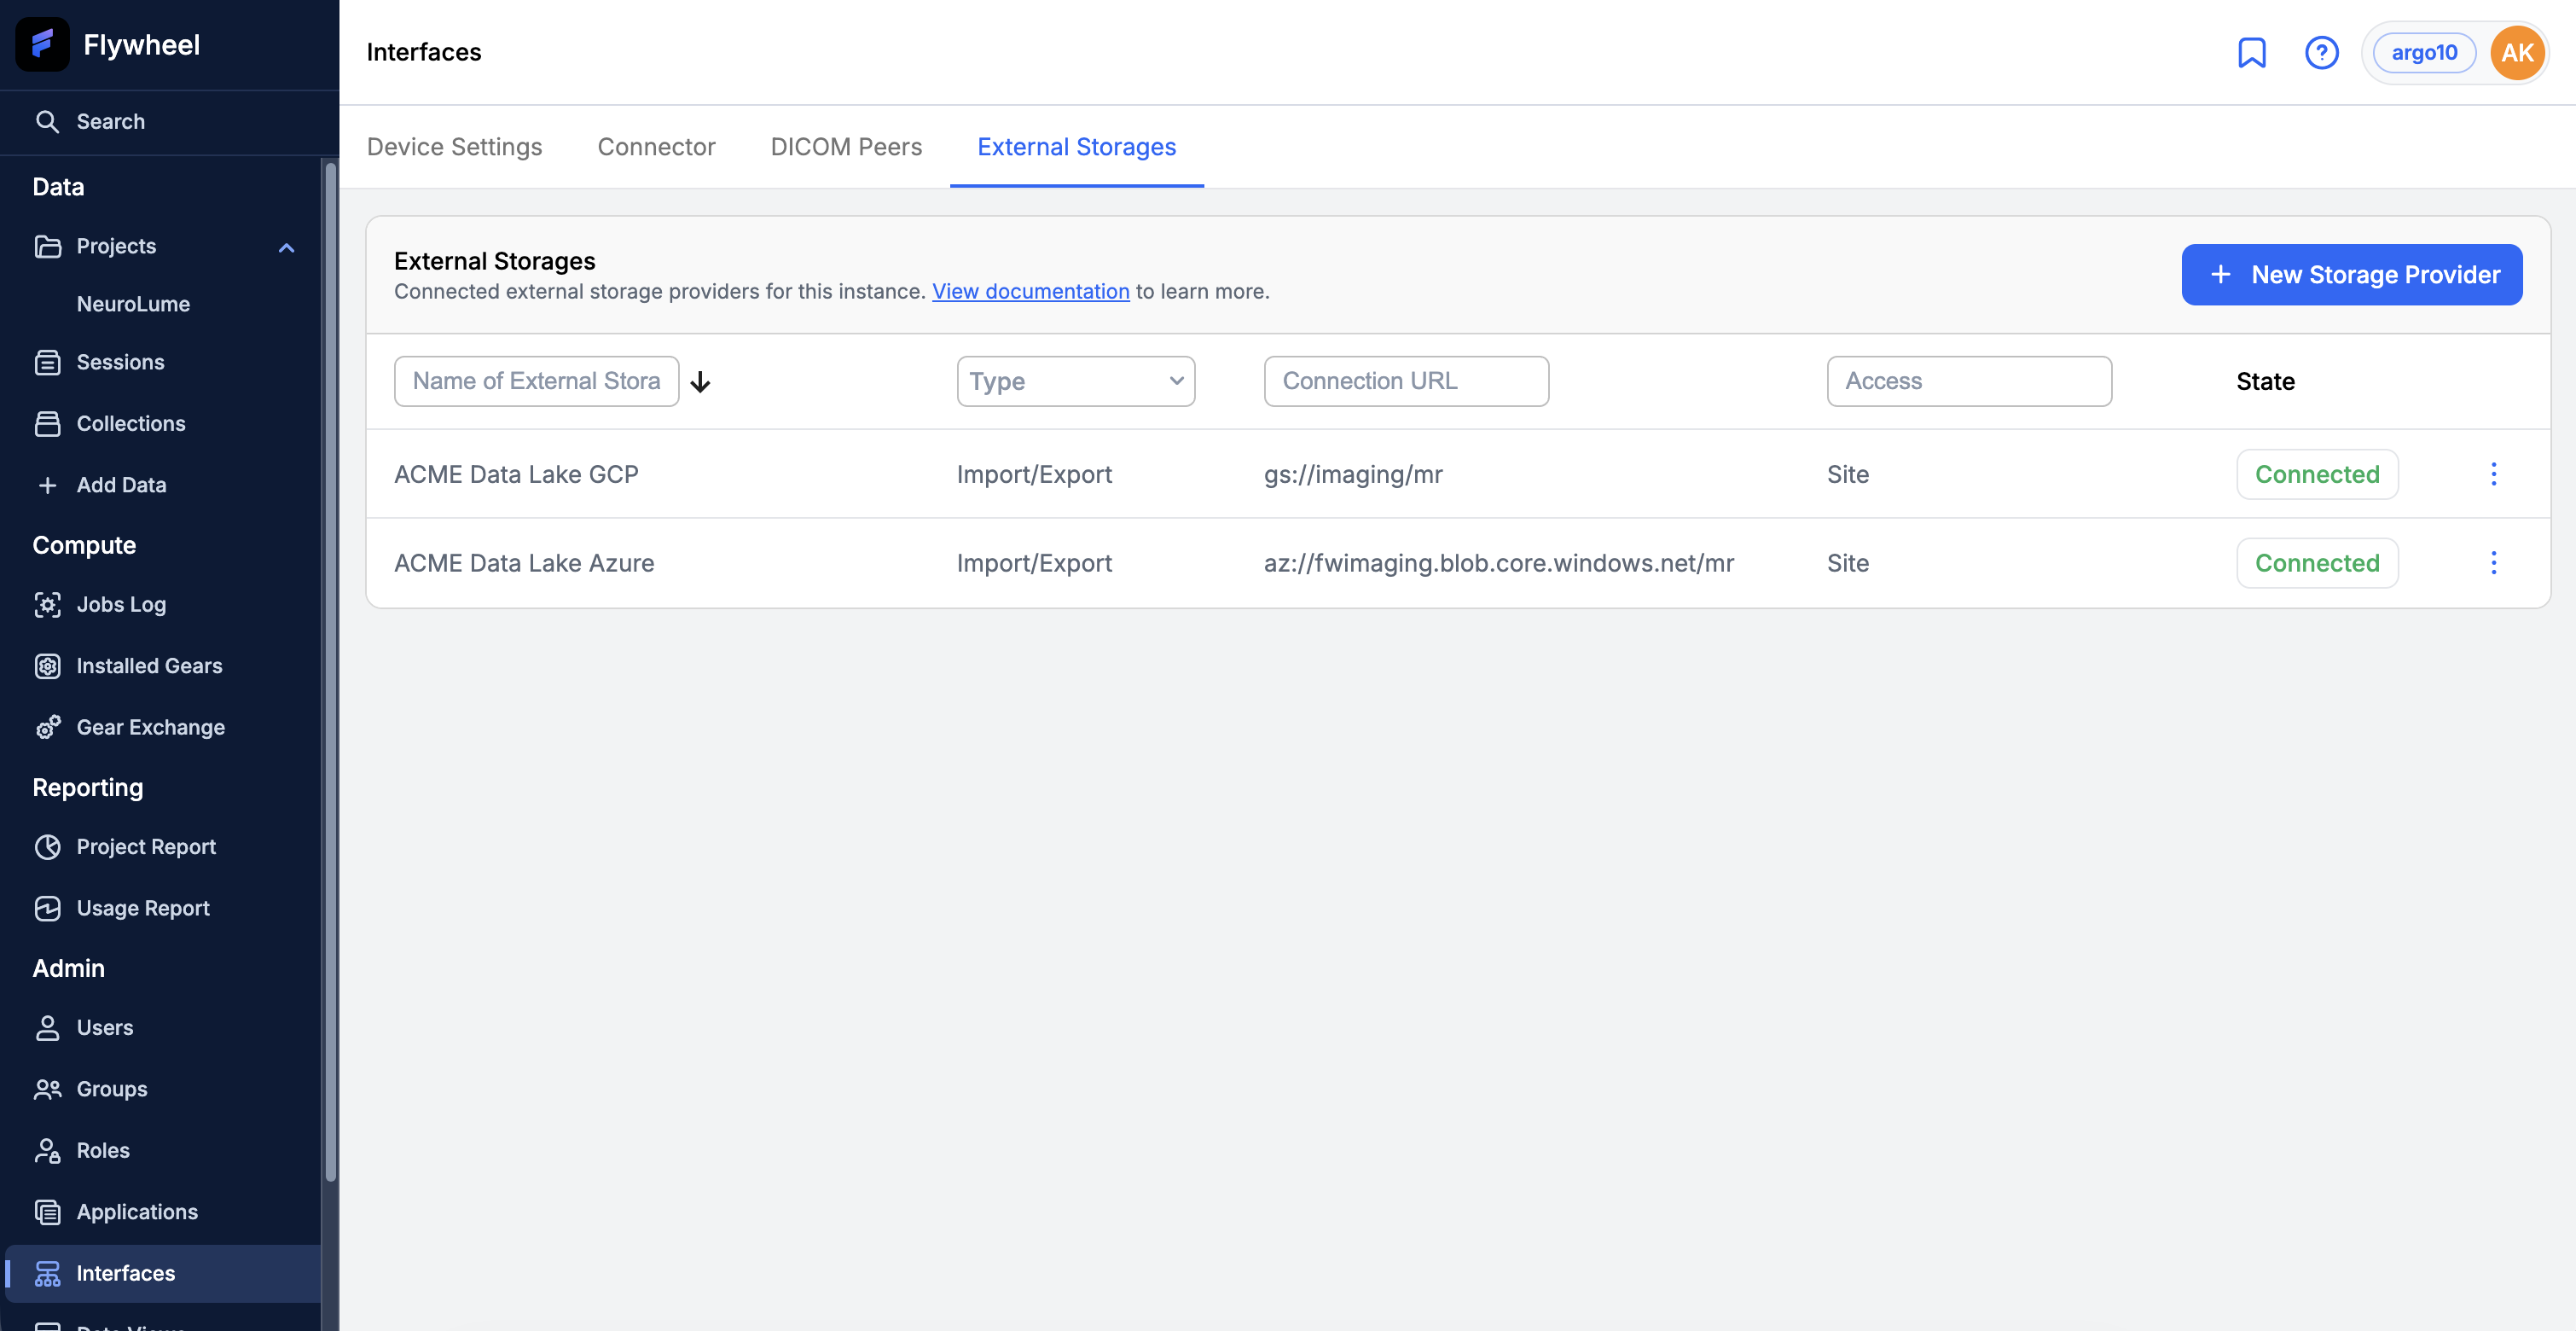
The list shows each registered storage with its Type (whether import, export, or both are enabled), its Connection URL, its Access level, and its connection State (Connected or Disconnected). Use the column filters at the top of the list to find a specific storage.
Create a New External Storage
- From the External Storages tab, click + New Storage Provider.
- Enter a Storage Name — a unique, descriptive name of up to 63 characters.
- Select the storage provider by clicking its tile: Amazon S3, Google Cloud Storage, Azure Blob Storage, Amazon Health Imaging, or File System.
- On the Provider Details tab, complete the location fields for the selected provider (see Provider Details fields below).
- Under Data Access Control, enable at least one of Allow Importing or Allow Exporting. Optionally enable Malware Scanning to scan all imported files before they are accepted.
- Set the Credential Source and Authentication Details (see Authentication below).
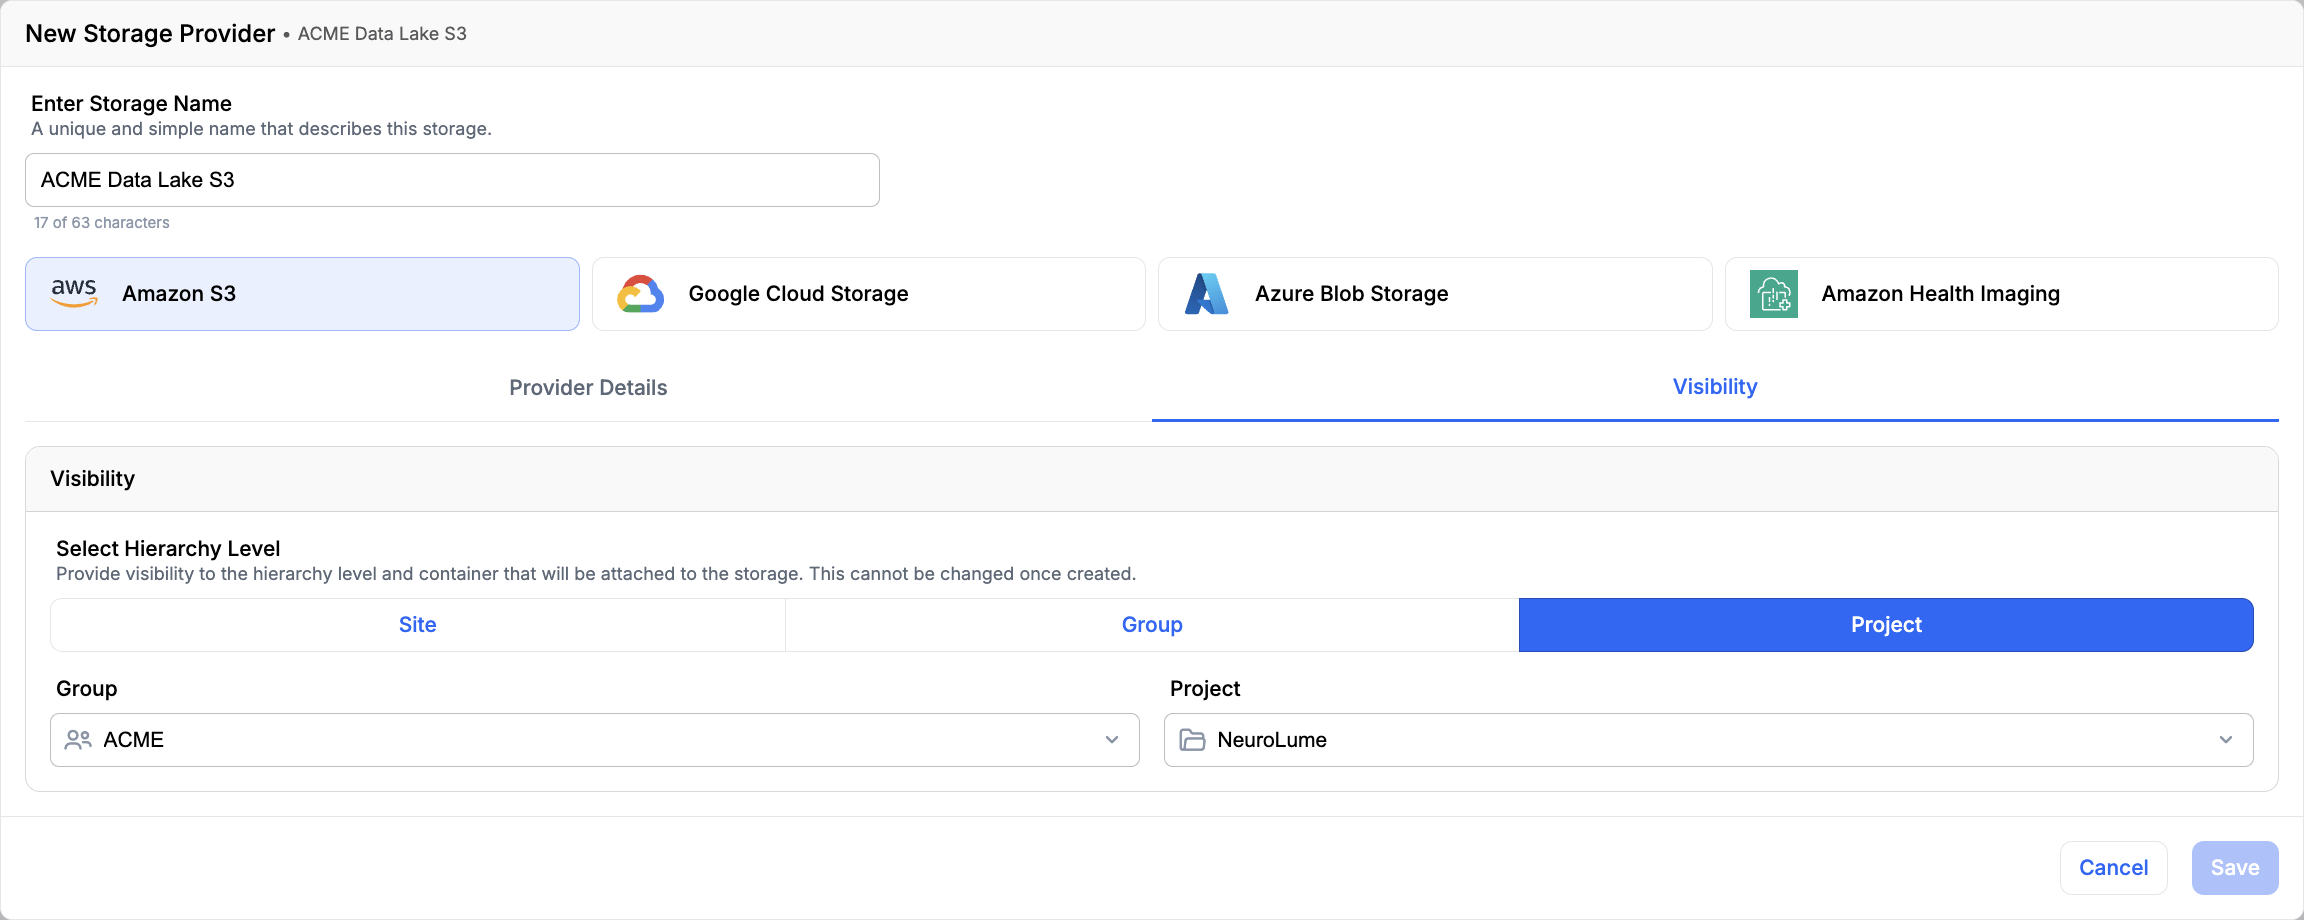
- Click the Visibility tab and choose whether the storage is available across the whole Site, or only to a specific Group or Project.
- Click Save. Flywheel saves the registration and runs a connection test.
File System availability
The File System tile appears only on sites where a file system (NFS) volume has been mounted into the Flywheel cluster. On sites without a mounted file system, the tile is hidden and only the cloud providers are shown.
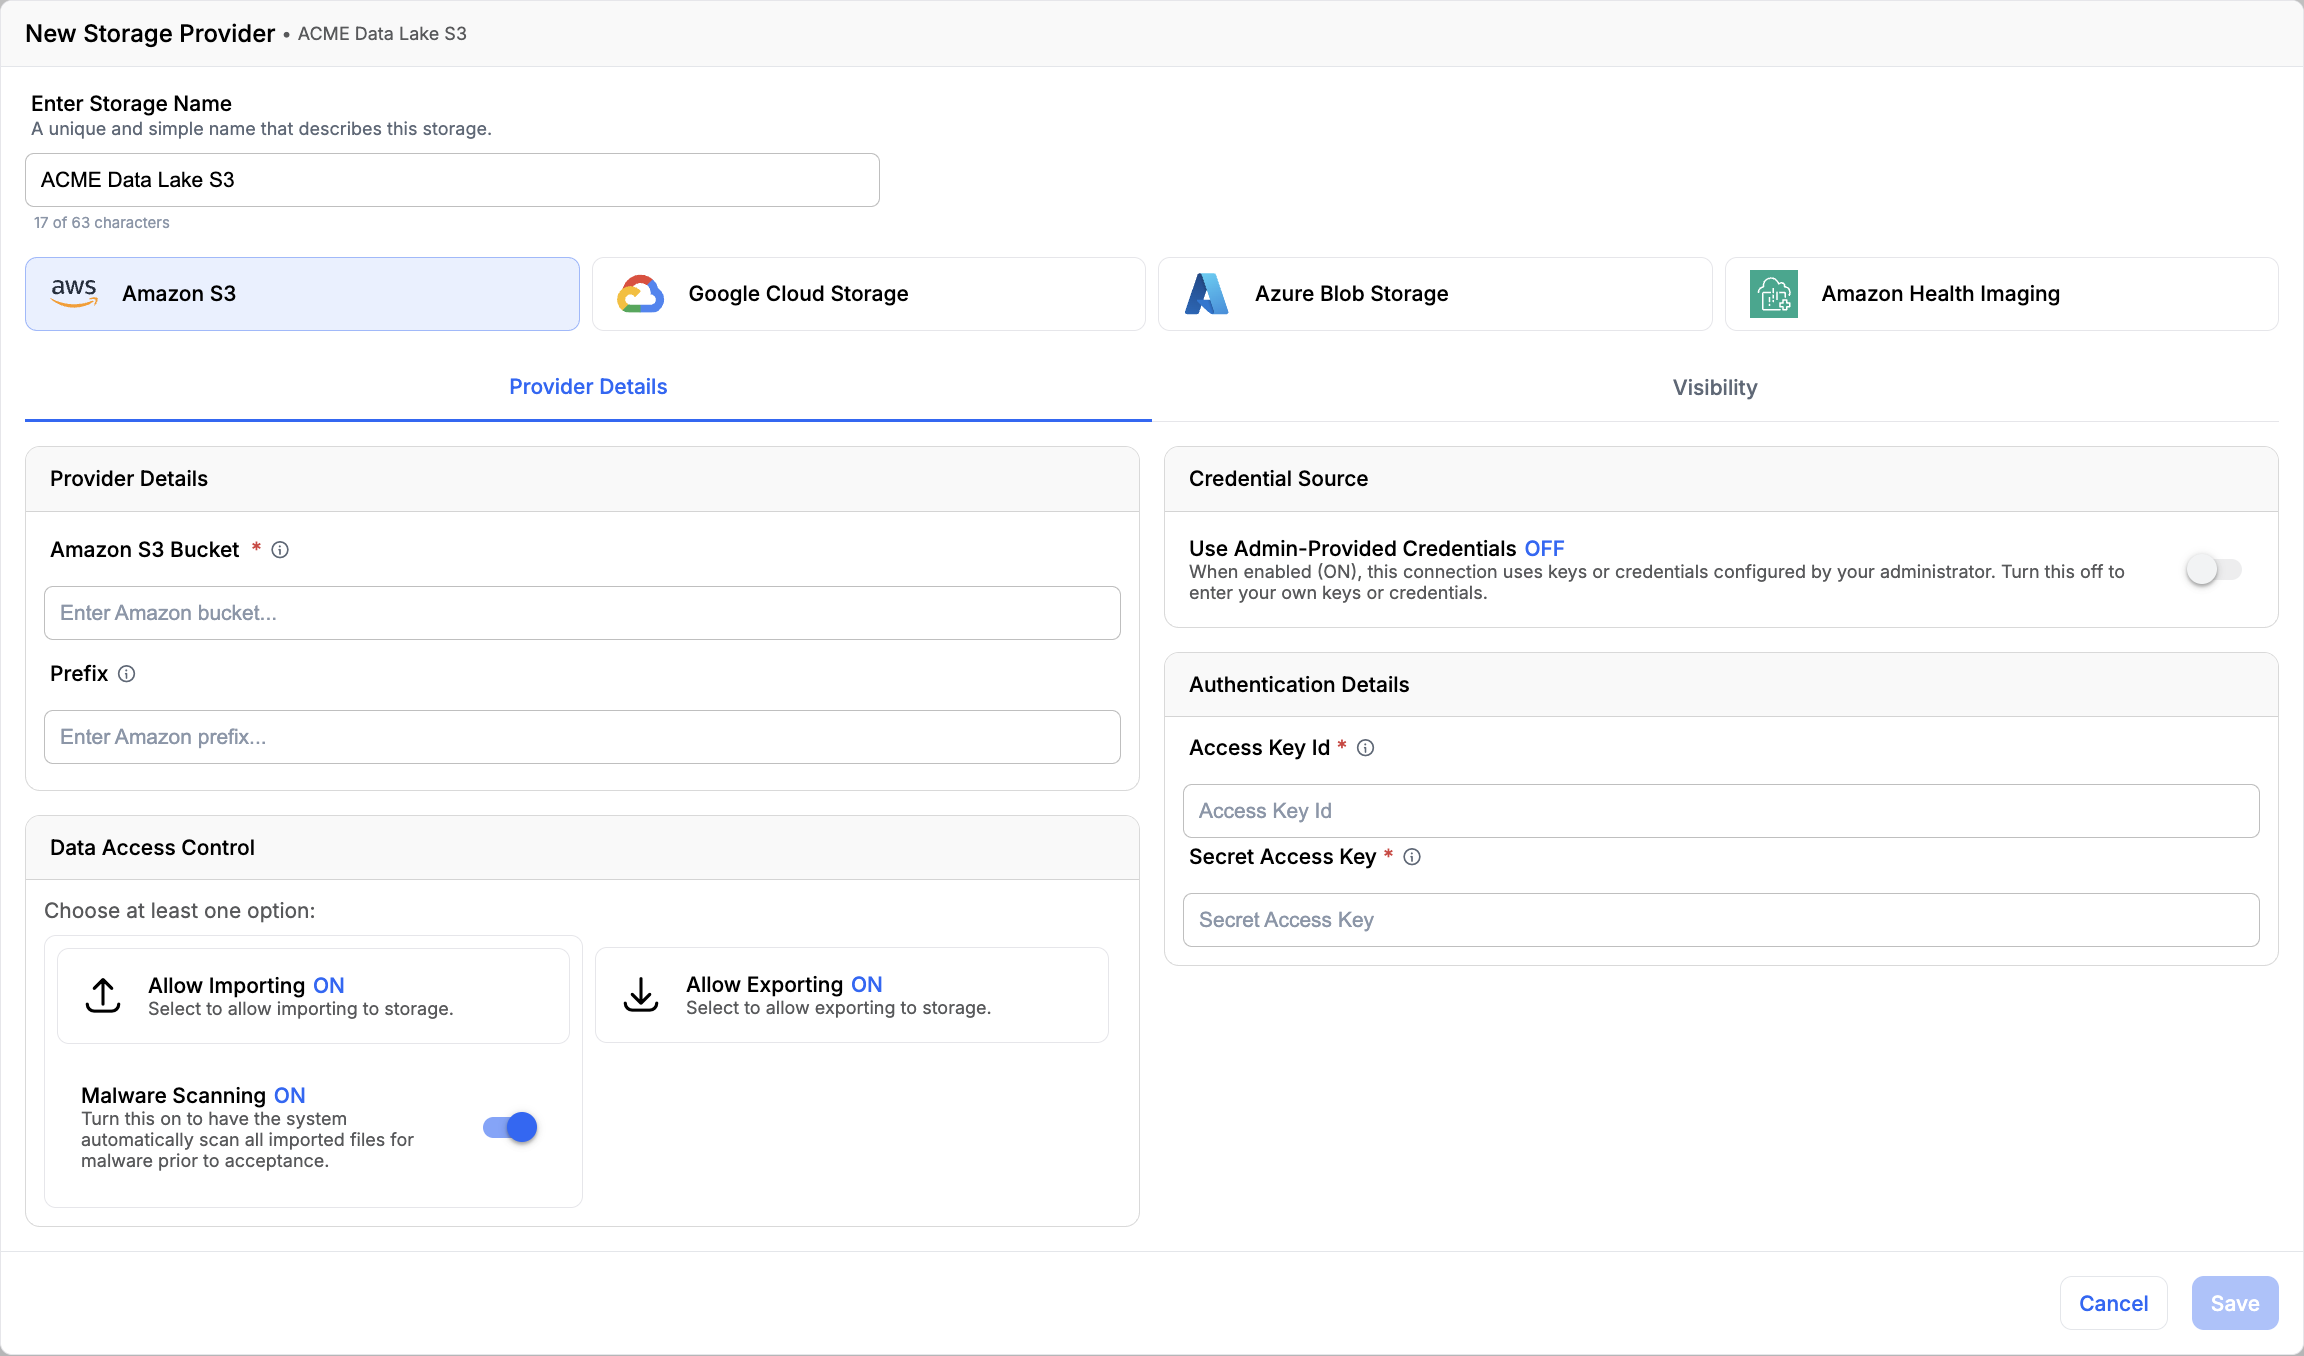
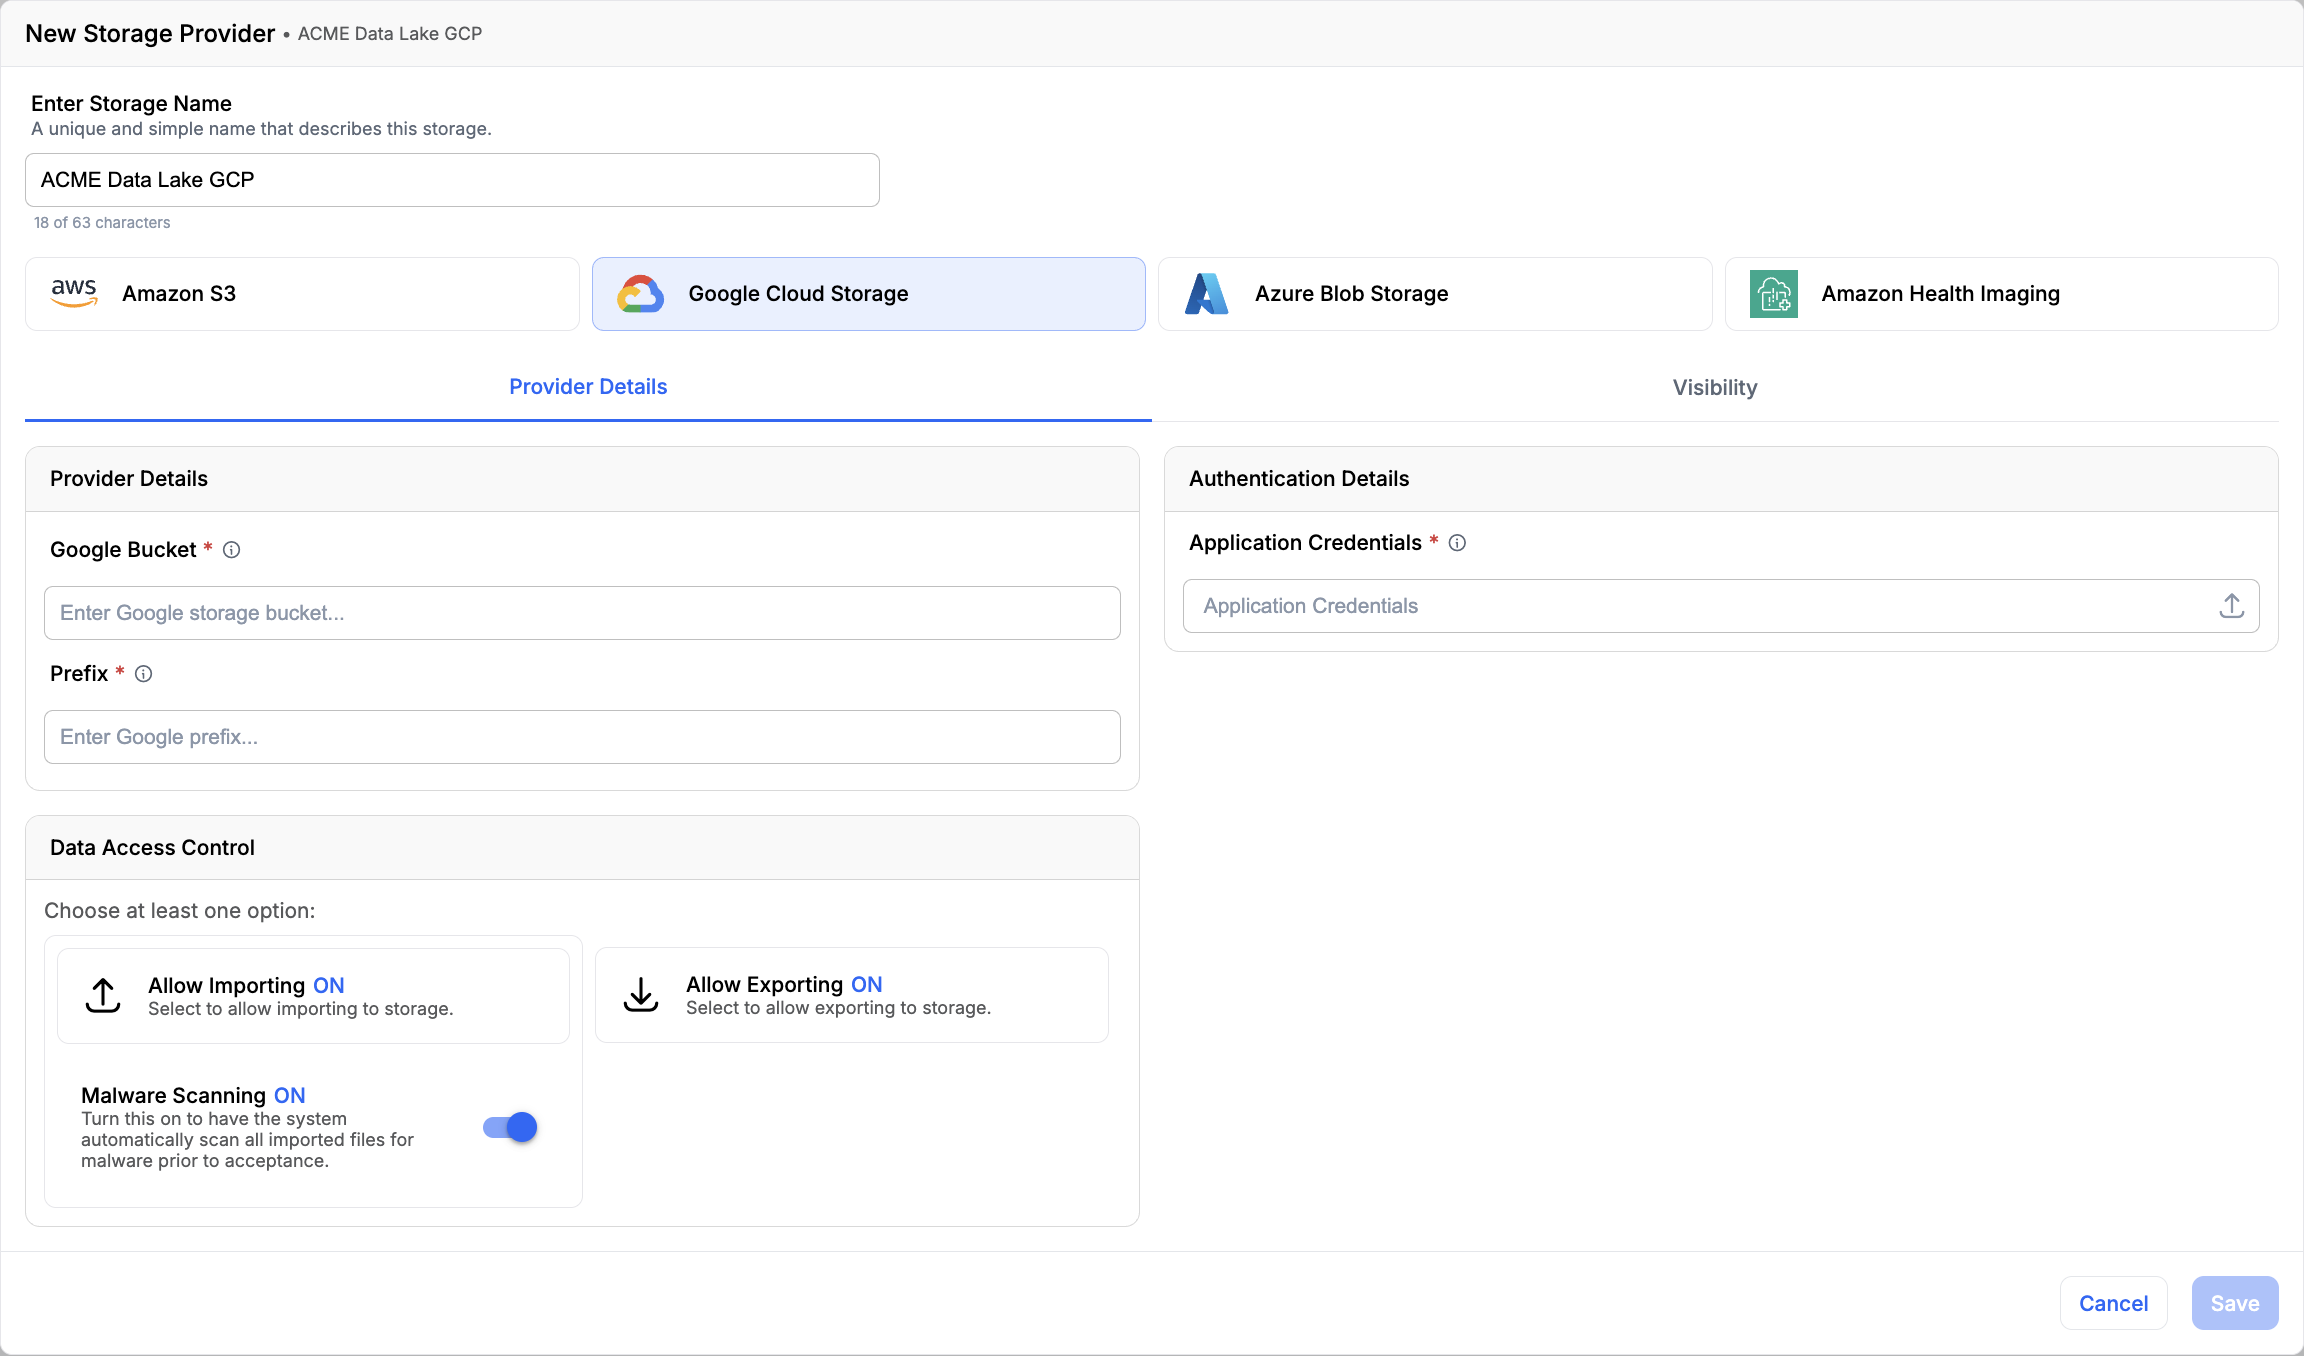
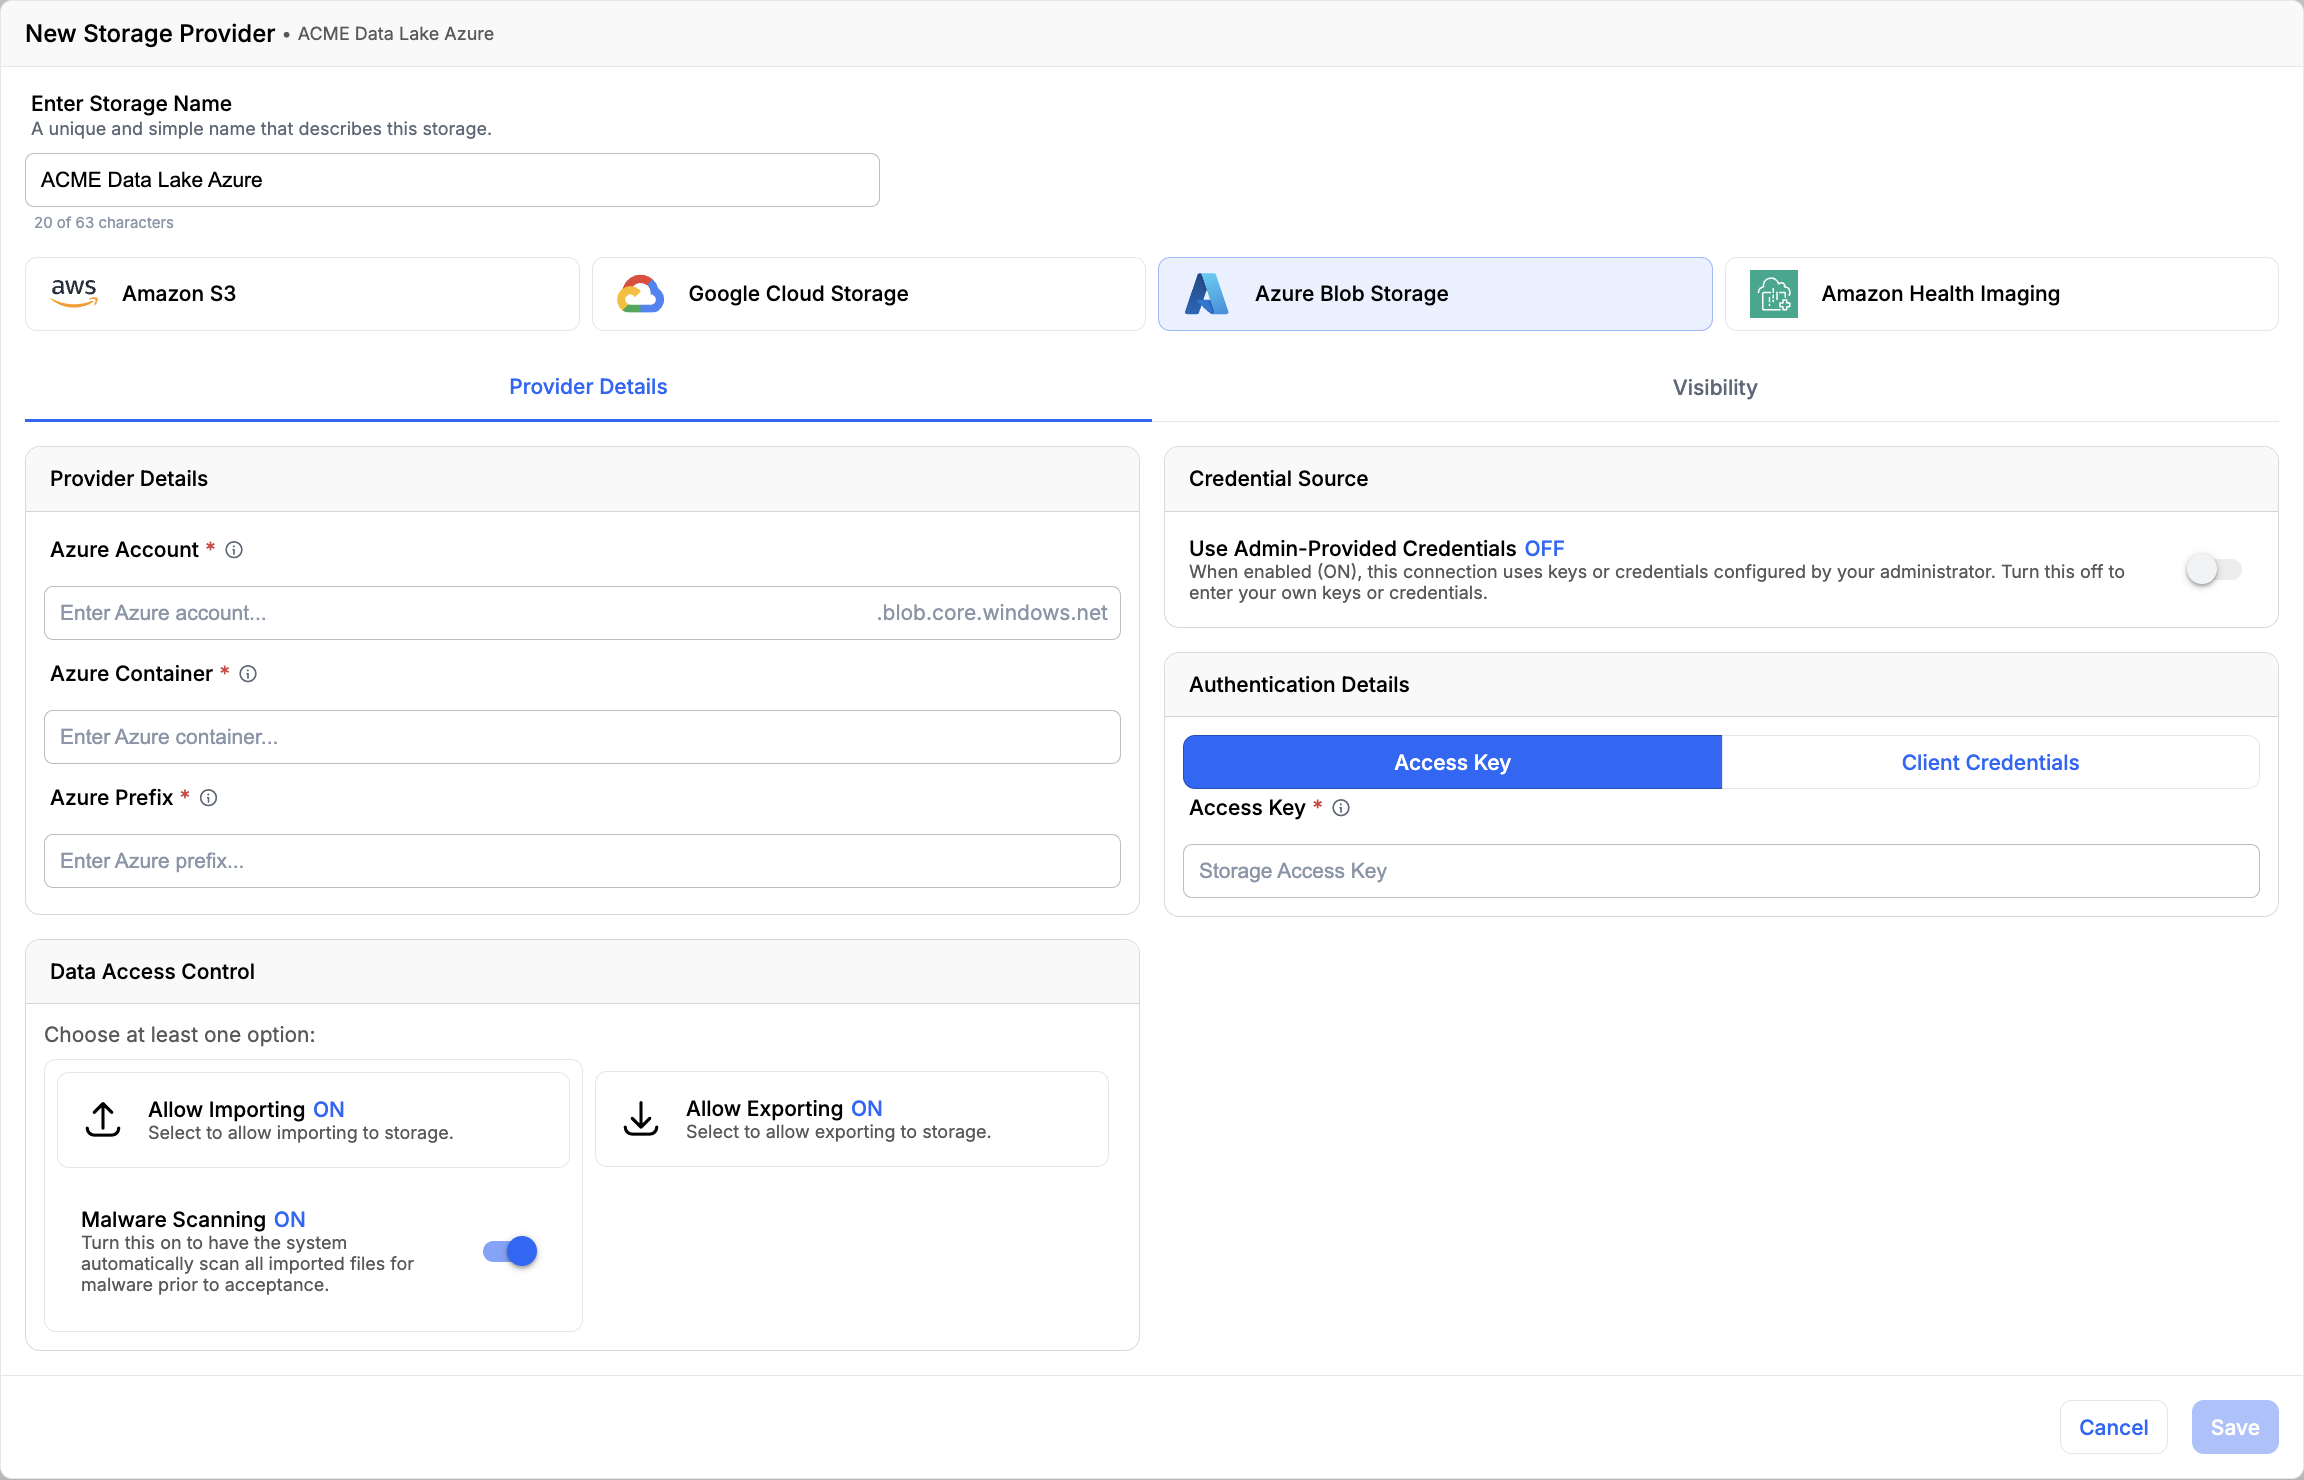
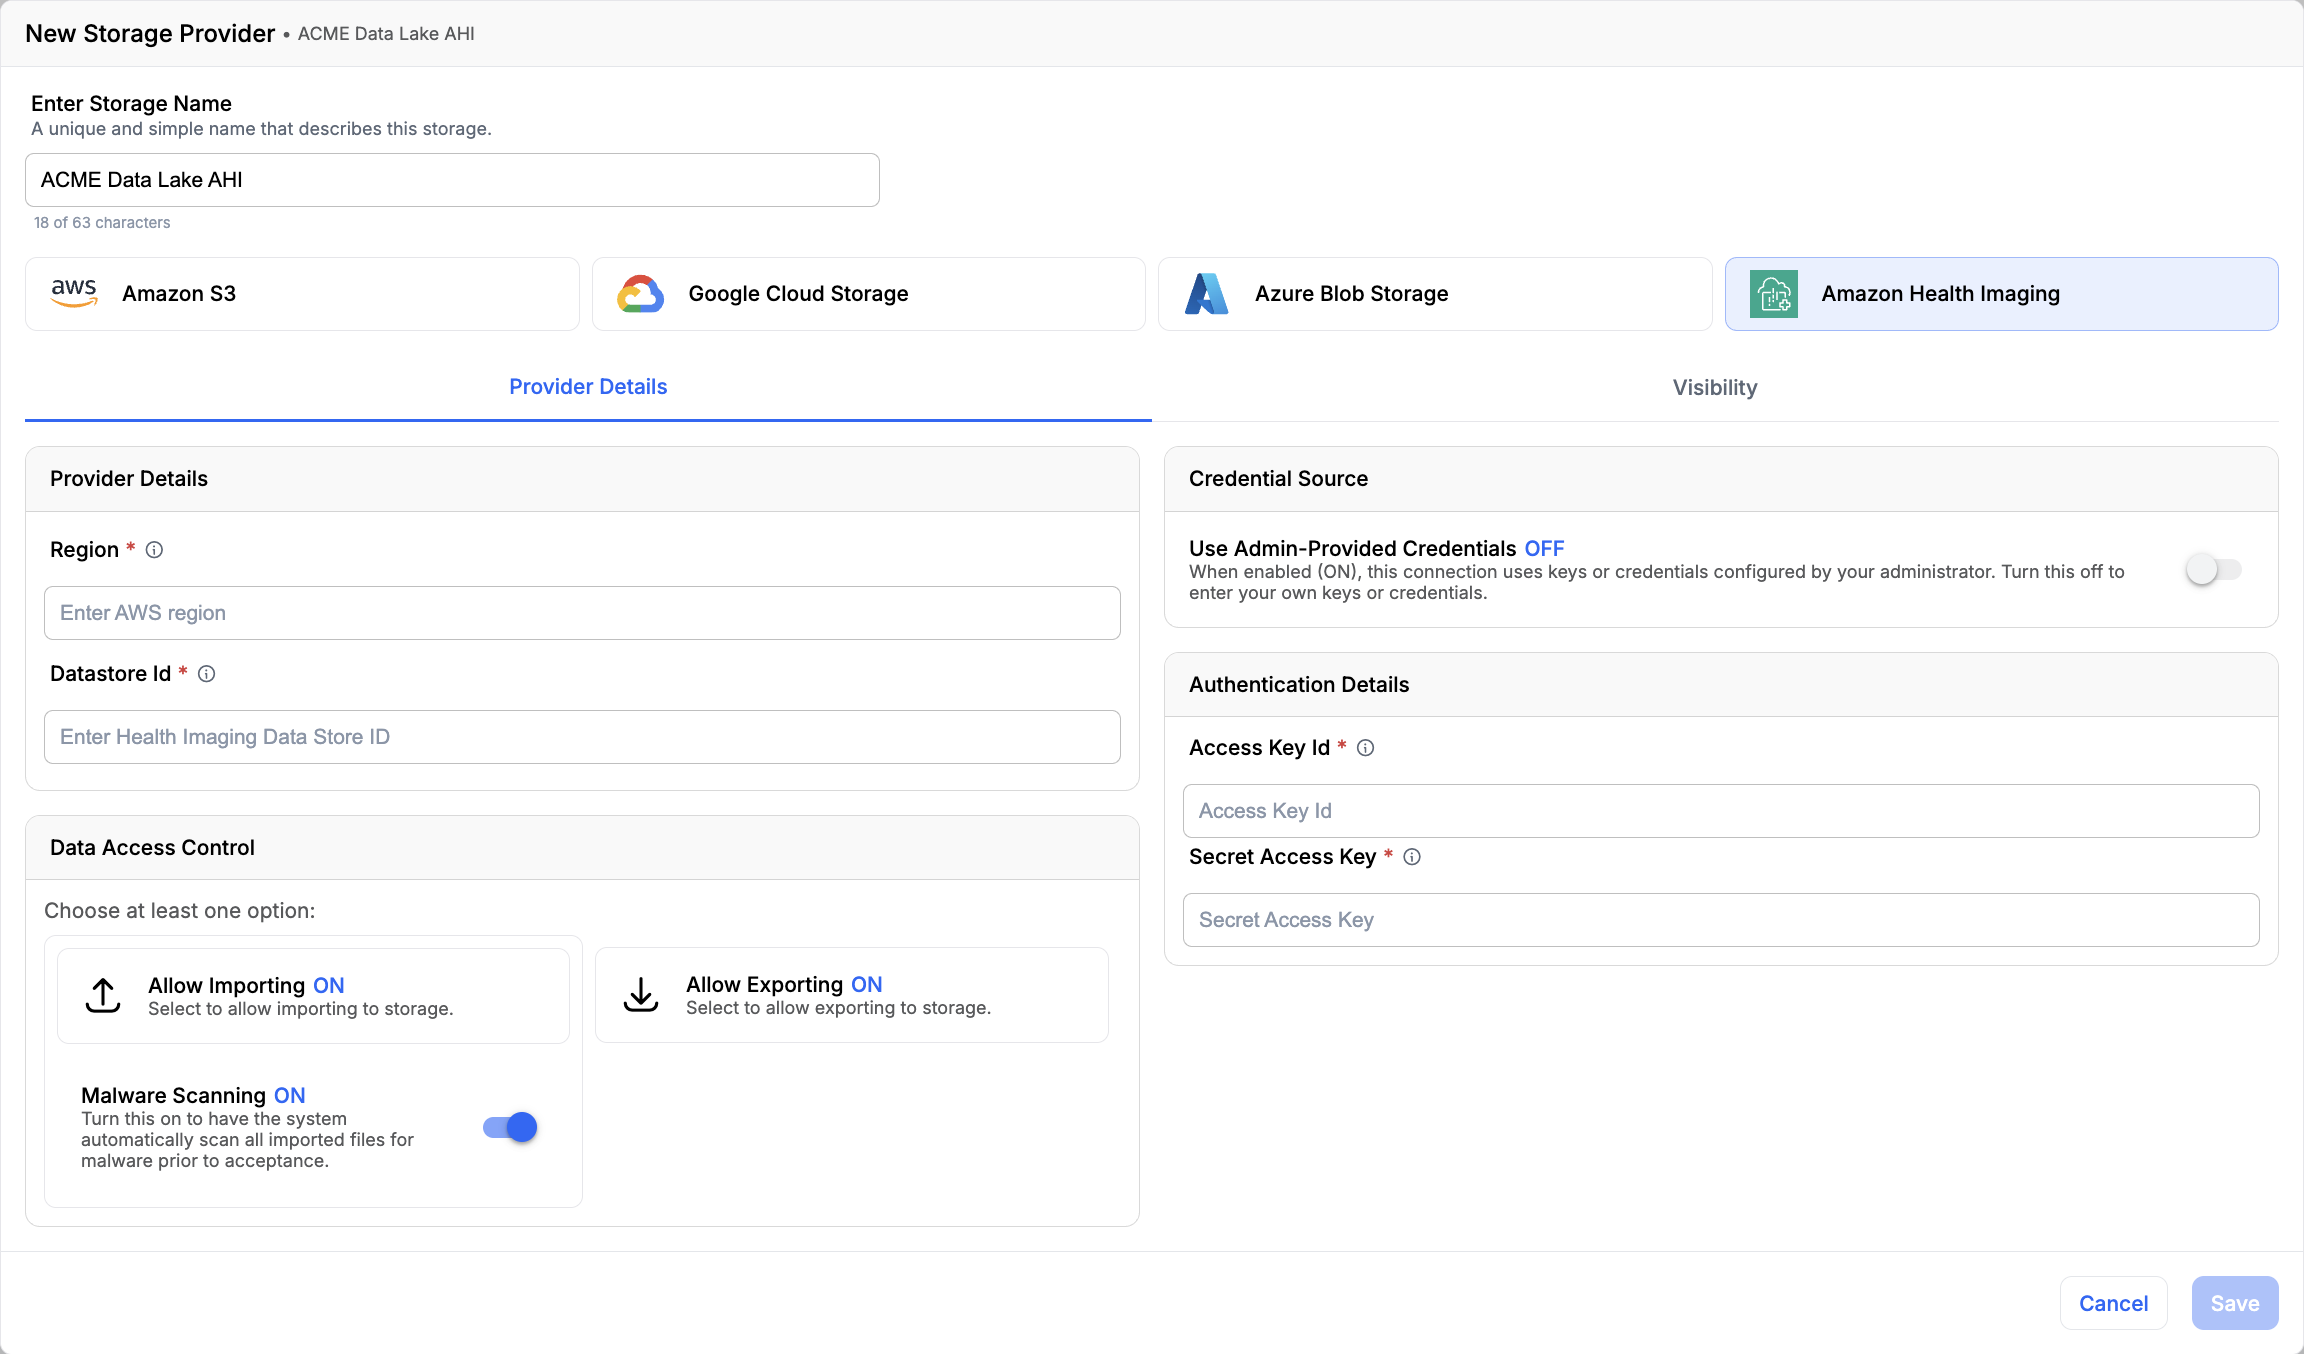
The New Storage Provider form shows different fields depending on the selected provider. Select a tab to see the form for each provider:
Provider Details fields
The Provider Details tab shows different location fields depending on the selected provider:
| Provider | Location fields |
|---|---|
| Amazon S3 | Amazon S3 Bucket, Prefix |
| Google Cloud Storage | Google Bucket, Prefix |
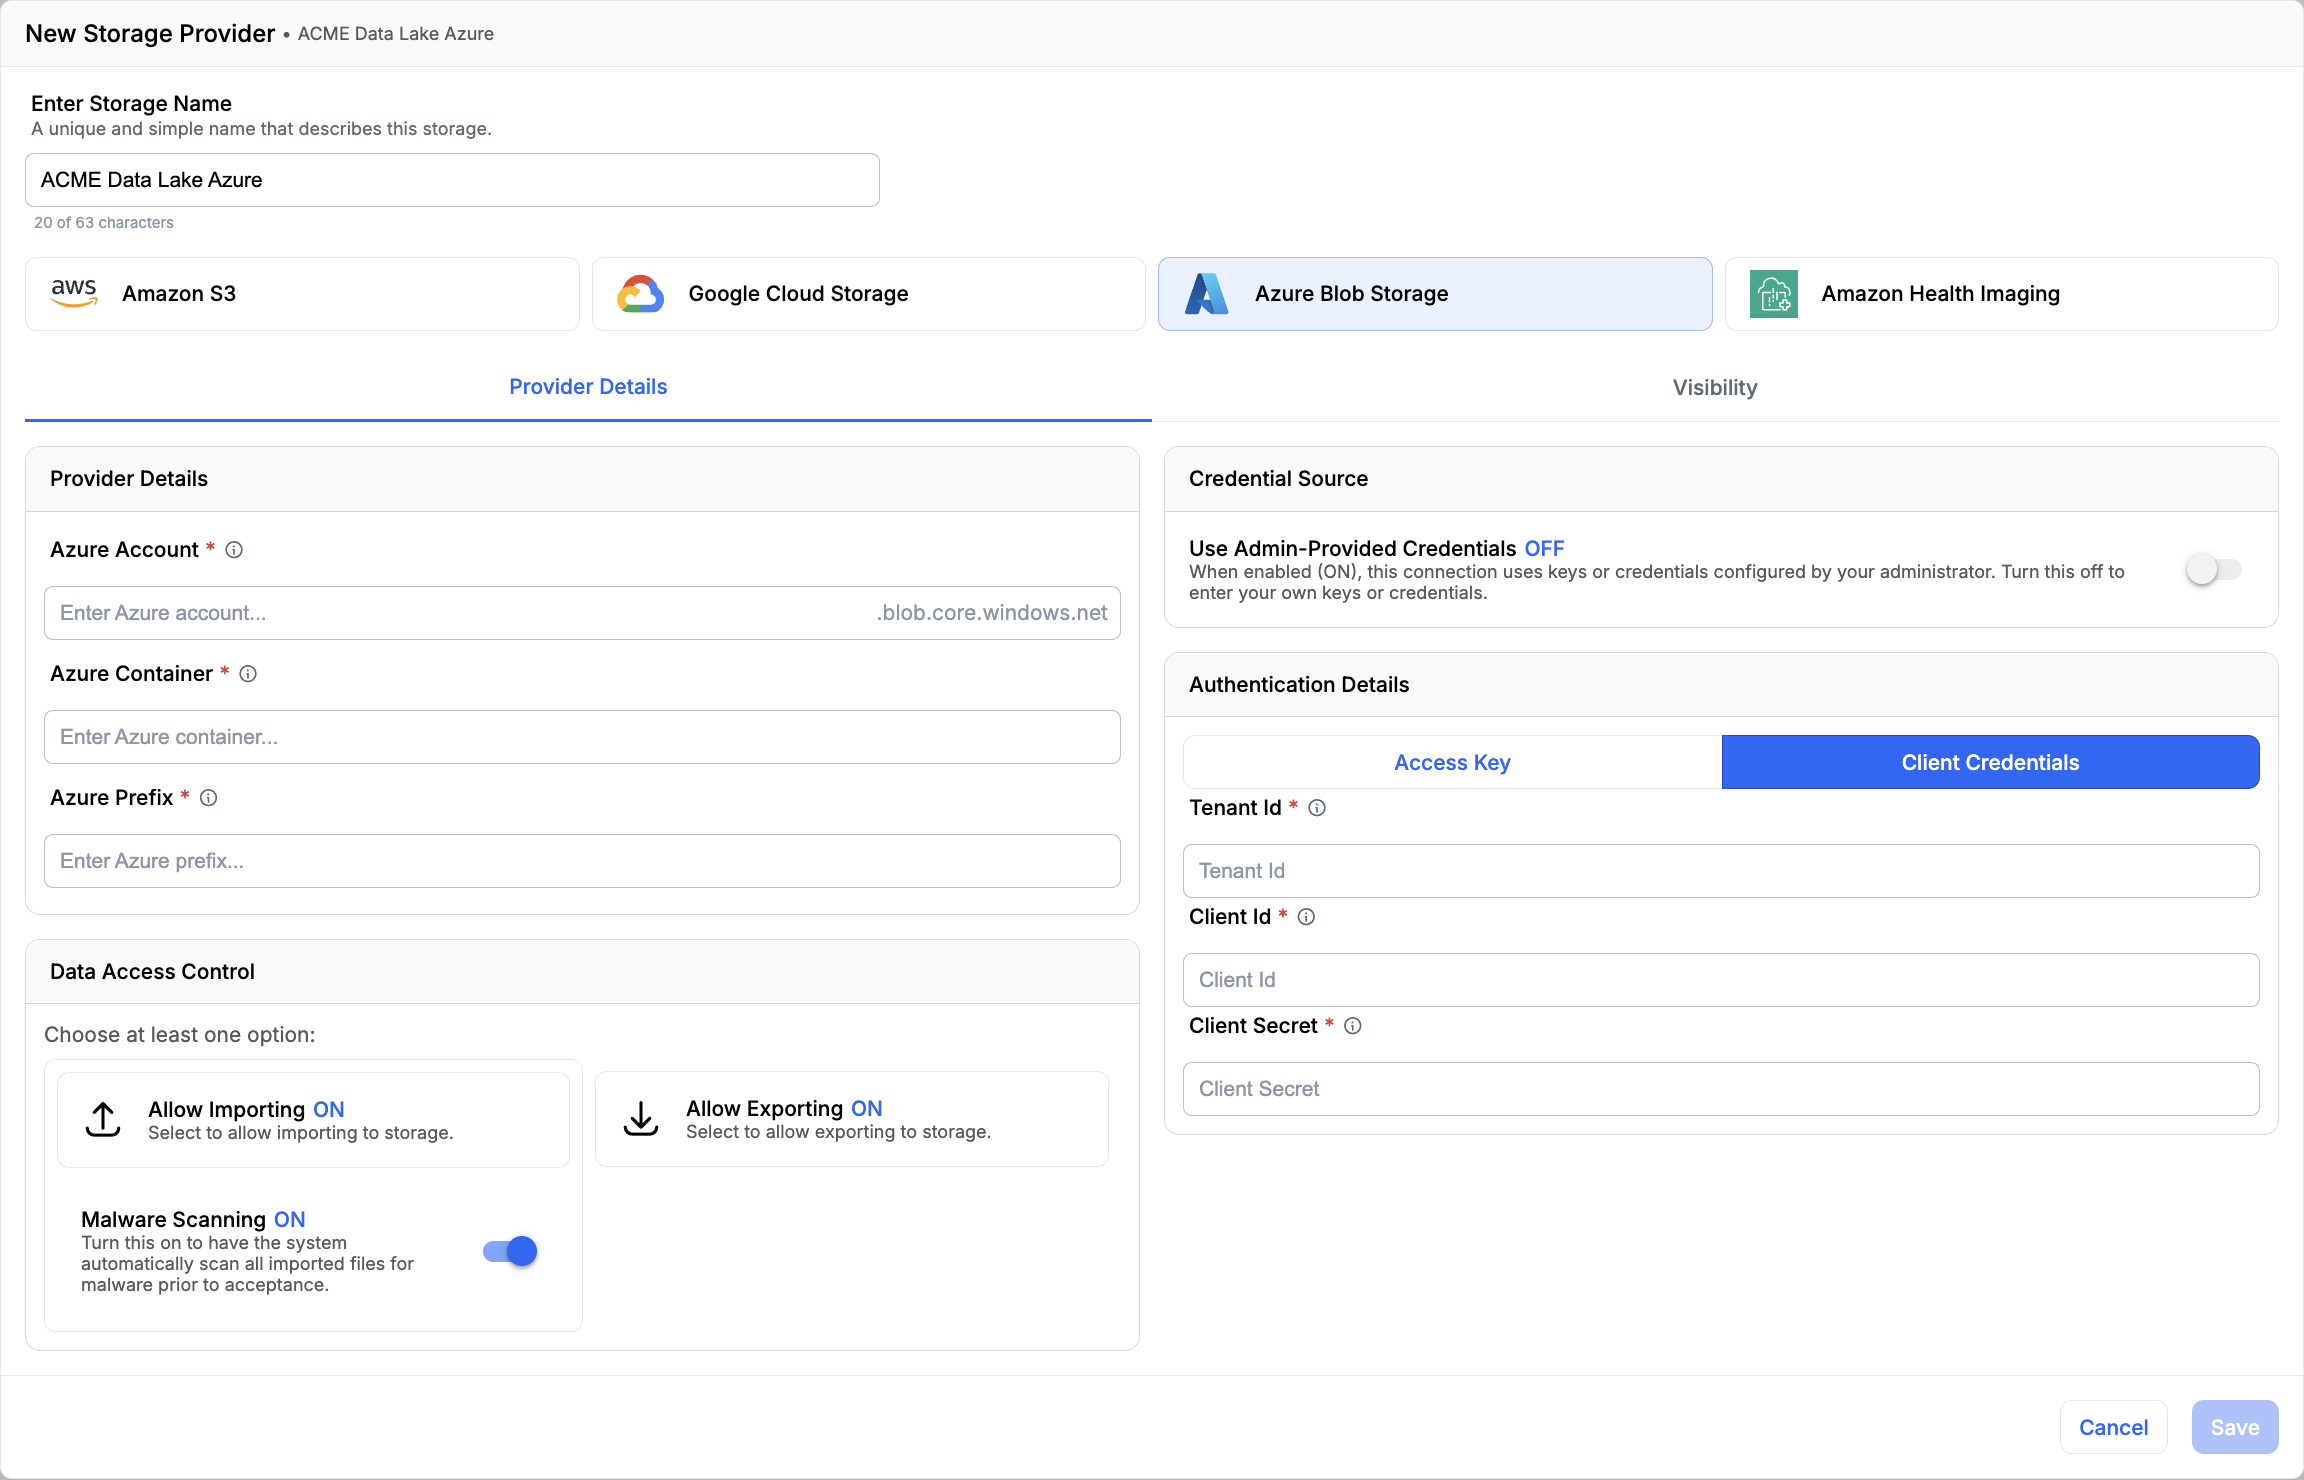
| Azure Blob Storage | Azure Account, Azure Container, Azure Prefix |
| Amazon Health Imaging | Region, Datastore Id |
| File System | File-System Path |
For Amazon Health Imaging specifics, see Amazon HealthImaging as External Storage. For File System storages, see File System Permissions.
Authentication
Enter your credentials in the Authentication Details section. What you provide depends on the selected provider:
- Amazon S3 and Amazon Health Imaging accept an Access Key Id and a Secret Access Key.
- Azure Blob Storage accepts either an Access Key or Client Credentials (Tenant Id, Client Id, and Client Secret).
- Google Cloud Storage accepts an uploaded Application Credentials file.
- File System storages do not use credentials. Instead, set the Unix User ID, Group ID, and file permissions.
Alternative: Use Admin-Provided Credentials (Amazon and Azure only)
For Amazon S3, Amazon Health Imaging, and Azure Blob Storage, you can avoid entering any credentials here at all. Turn on the Use Admin-Provided Credentials toggle in the Credential Source section, and the connection uses keys or credentials configured by your administrator instead. See Use Admin-Provided Credentials.
For Azure Blob Storage, use the Access Key / Client Credentials toggle in the Authentication Details section to choose how to authenticate. The Client Credentials option requires a Tenant Id, Client Id, and Client Secret:
Visibility
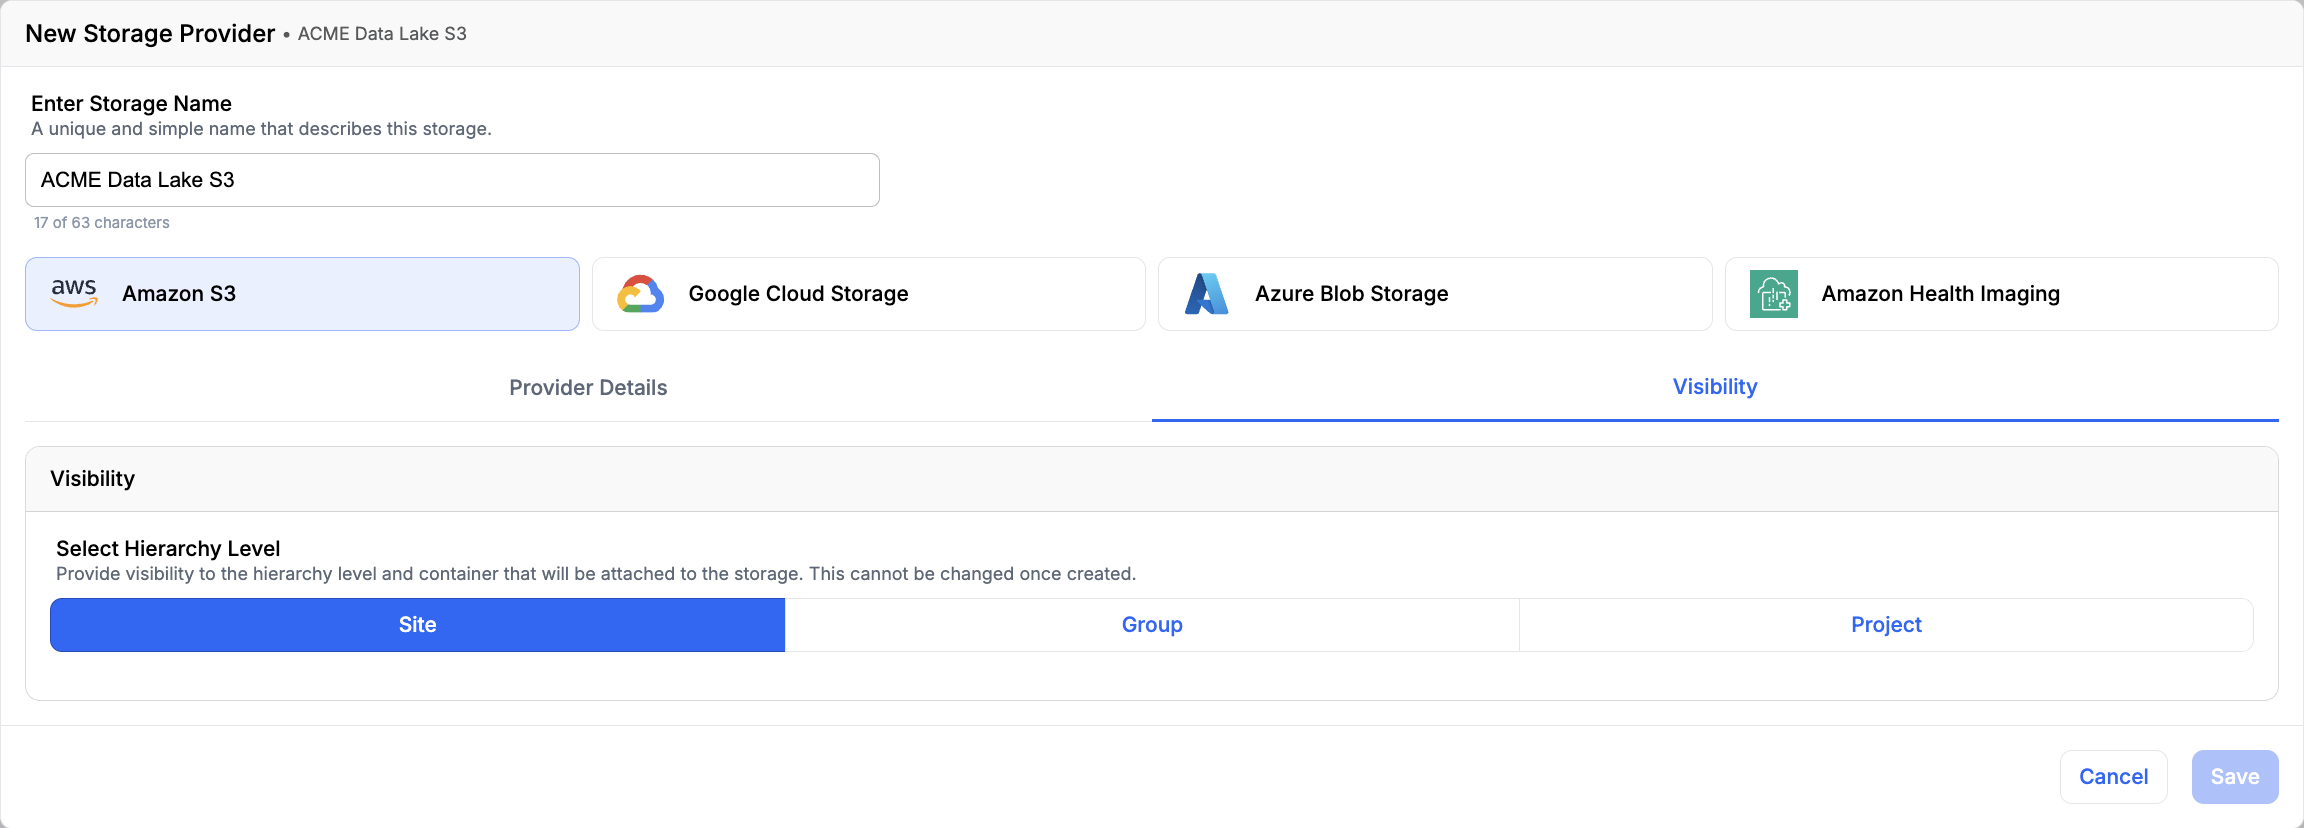
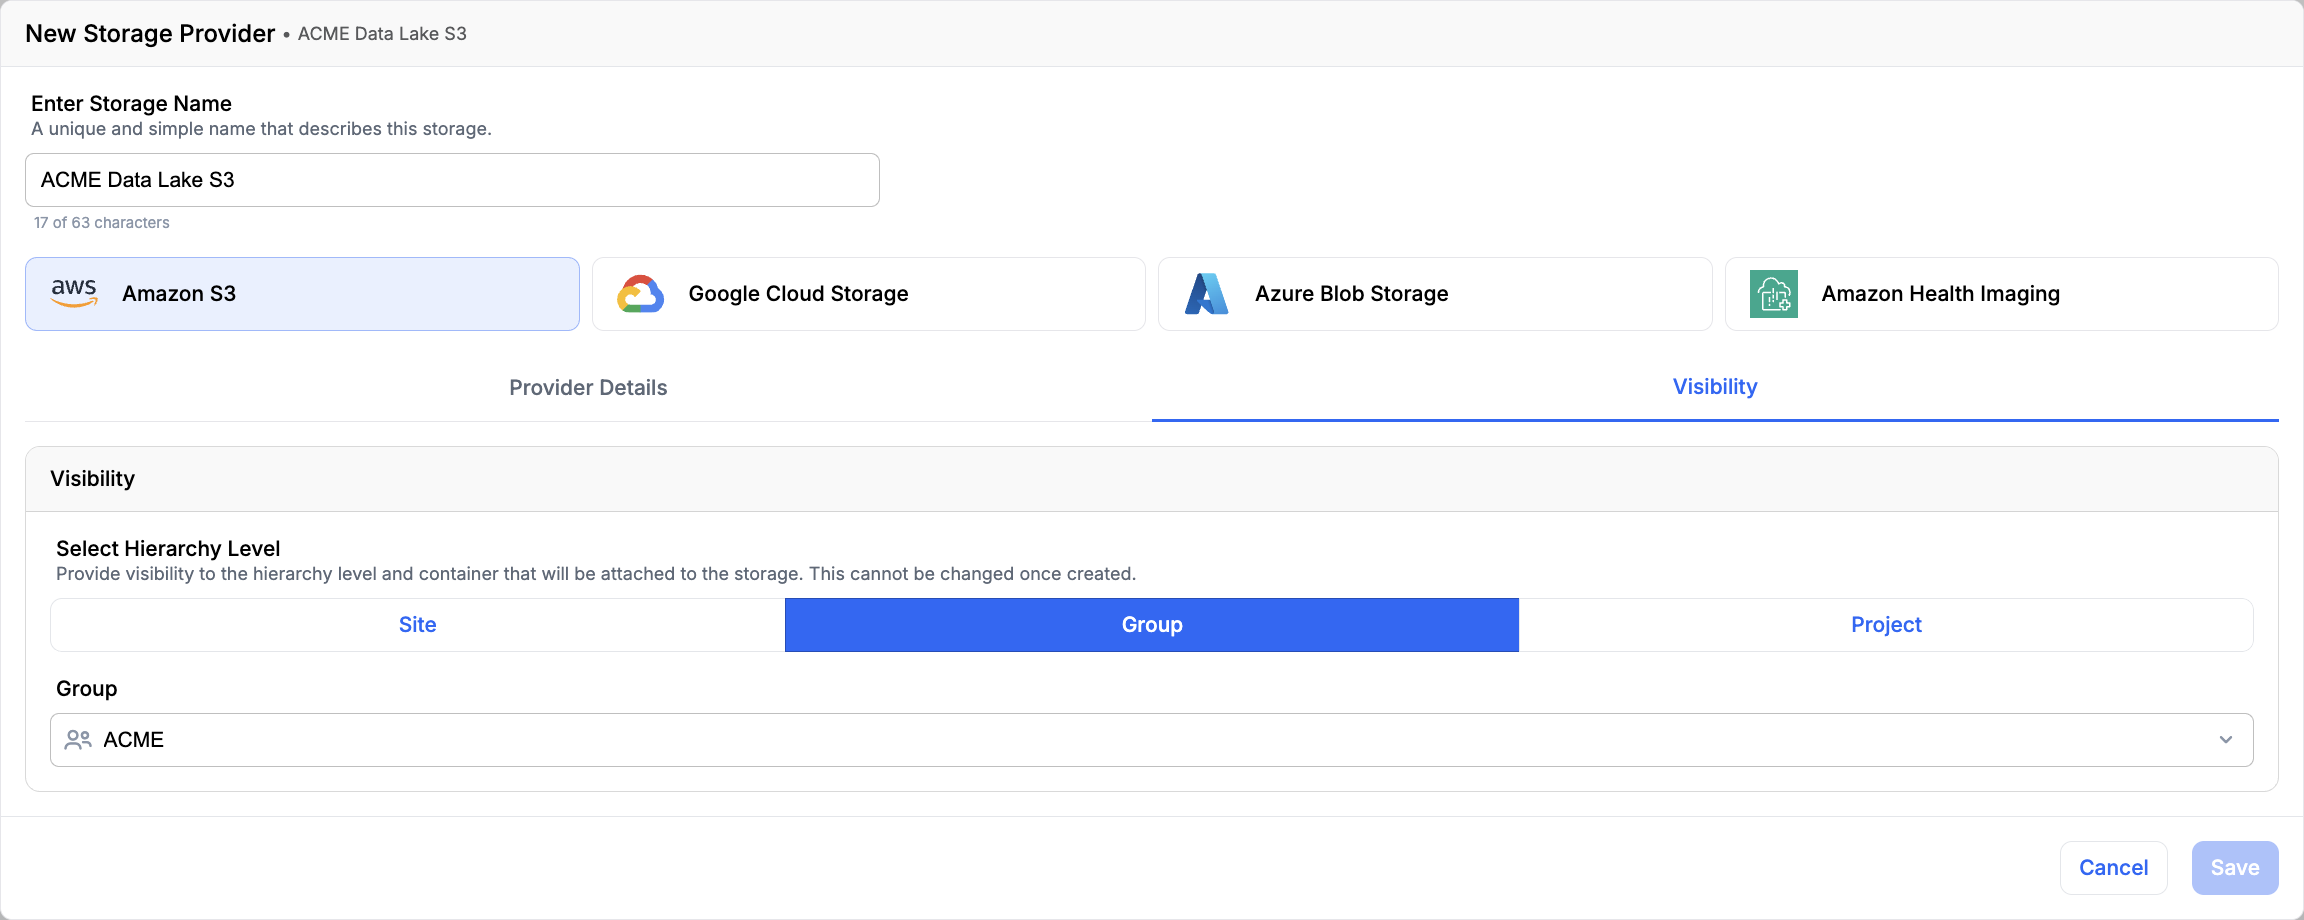
On the Visibility tab, choose the hierarchy level that can use the storage. This cannot be changed after the storage is created.
- Site — every Group and Project on the site can use the storage.
- Group — only the selected Group can use the storage.
- Project — only the selected Project (within a Group) can use the storage.
View and Edit an External Storage
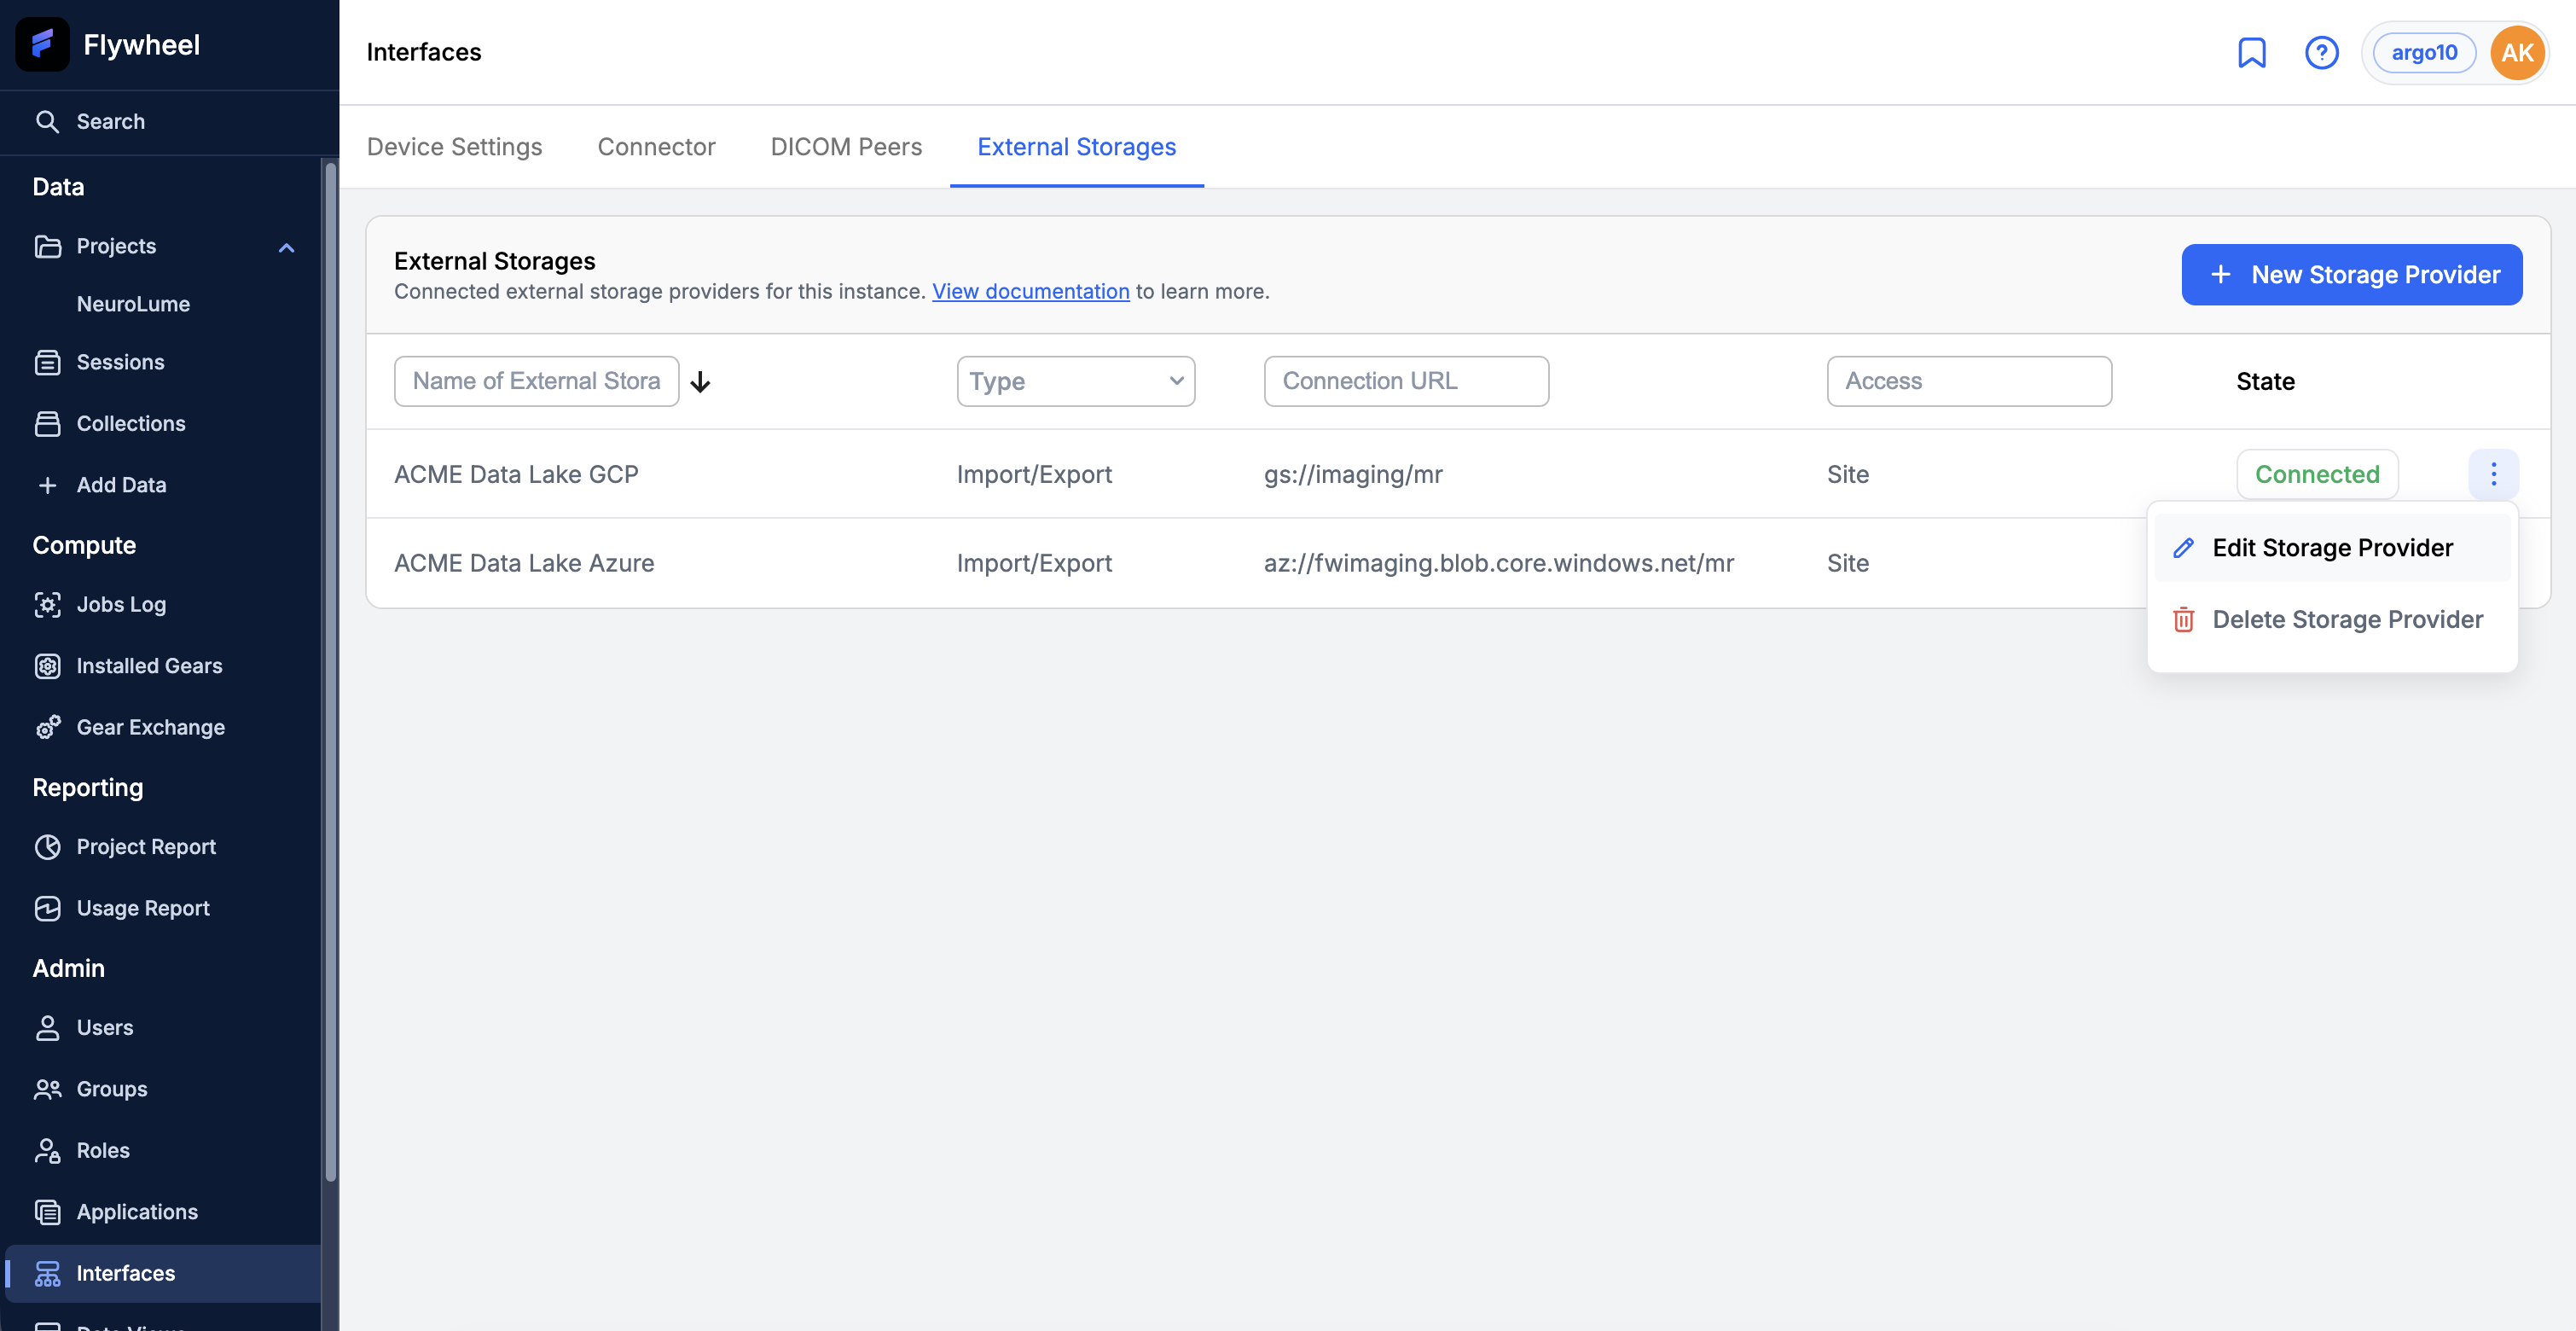
Click a storage in the list to open its detail page, or open the overflow menu (the three dots) on the storage's row and select Edit Storage Provider.
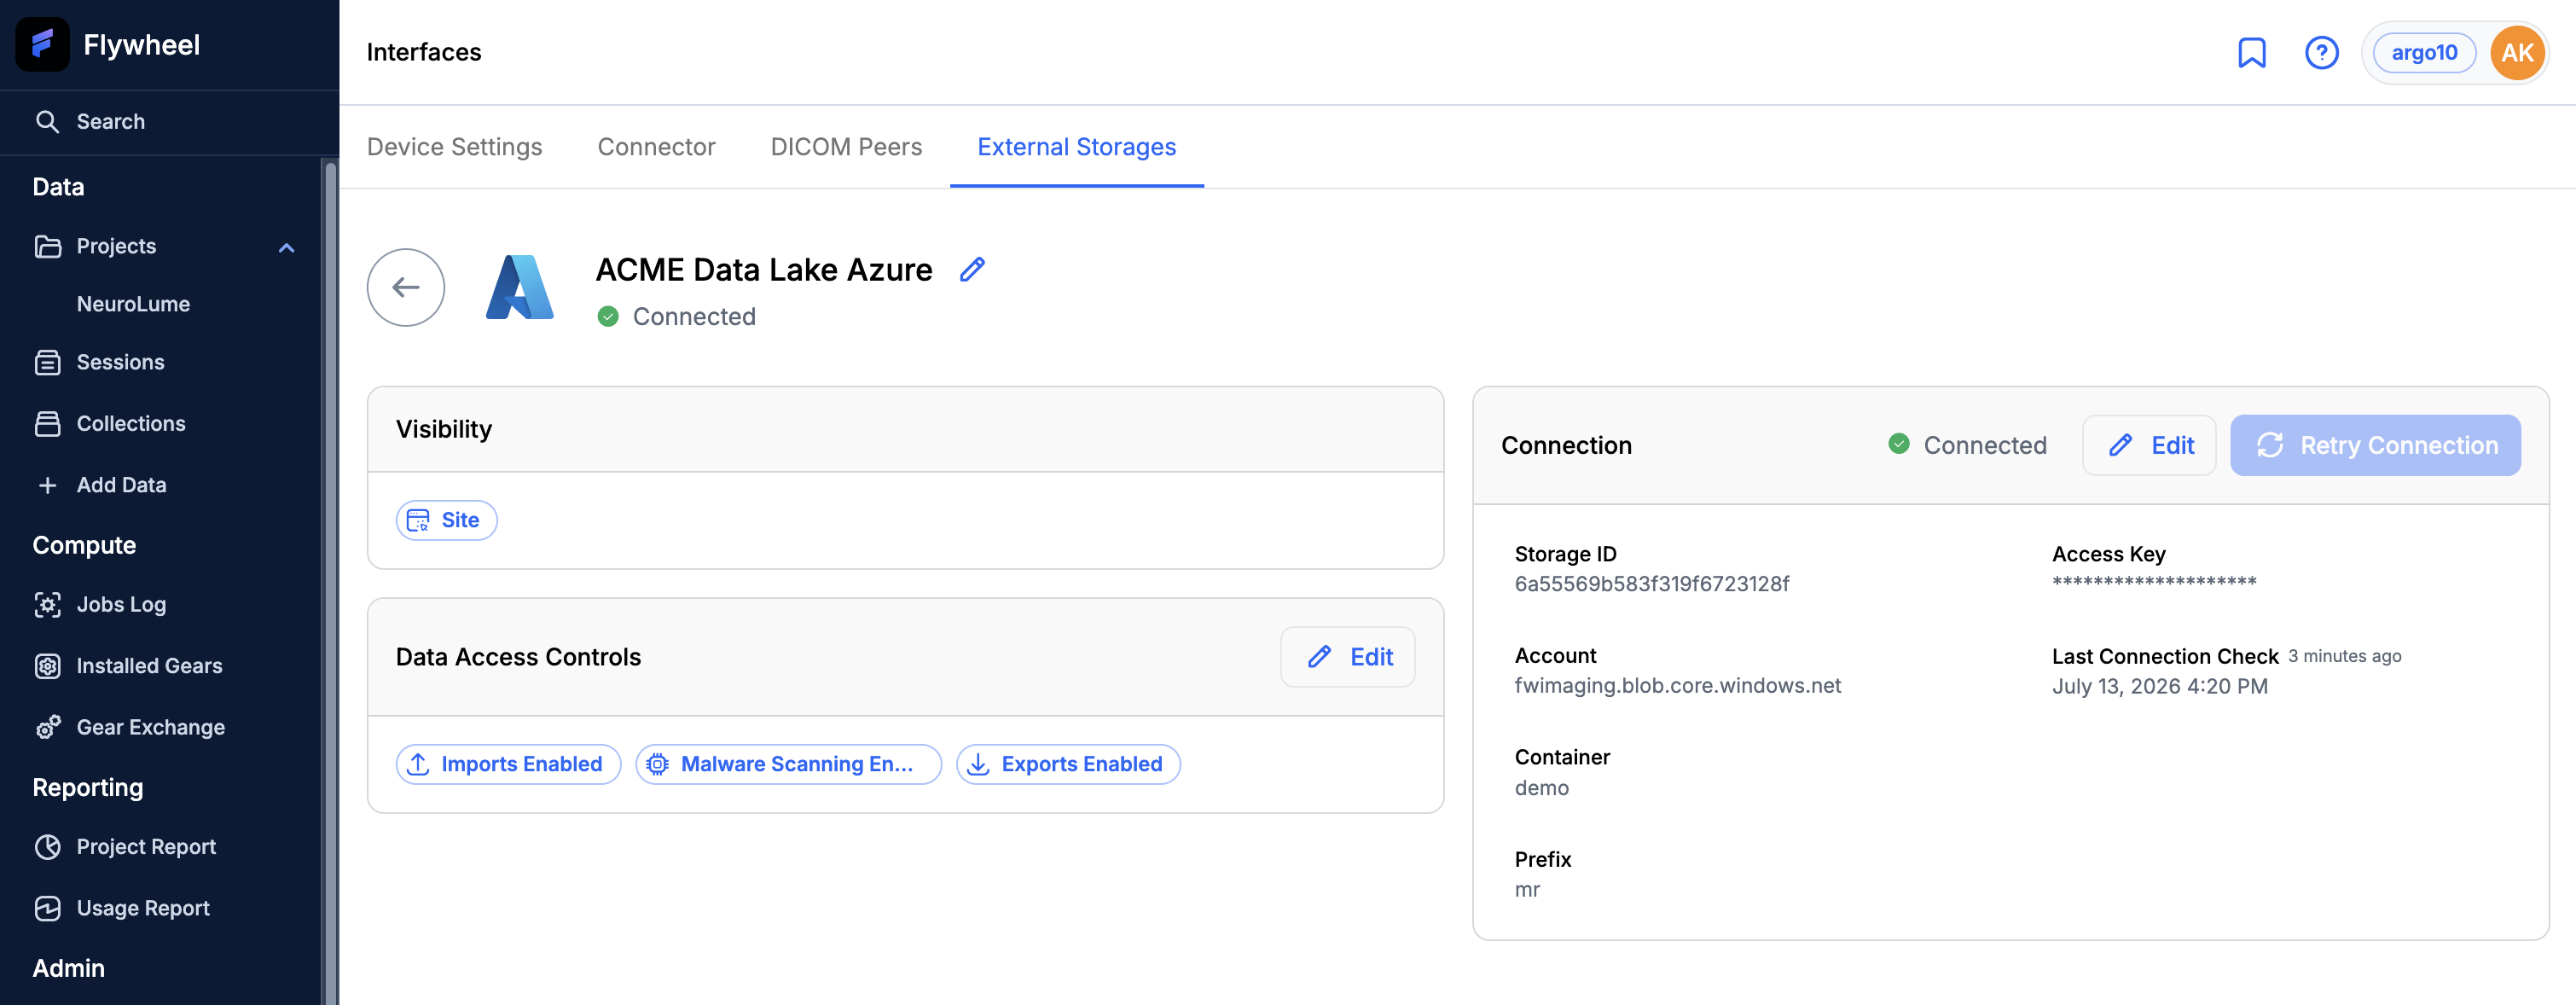
The detail page summarizes the storage in three cards:
- Visibility — the Site, Group, or Project that can use the storage.
- Data Access Controls — whether Imports and Exports are enabled. Click Edit to change them.
- Connection — the storage location and credential summary, along with the Last Connection Check time. Click Retry Connection to re-run the connection test.
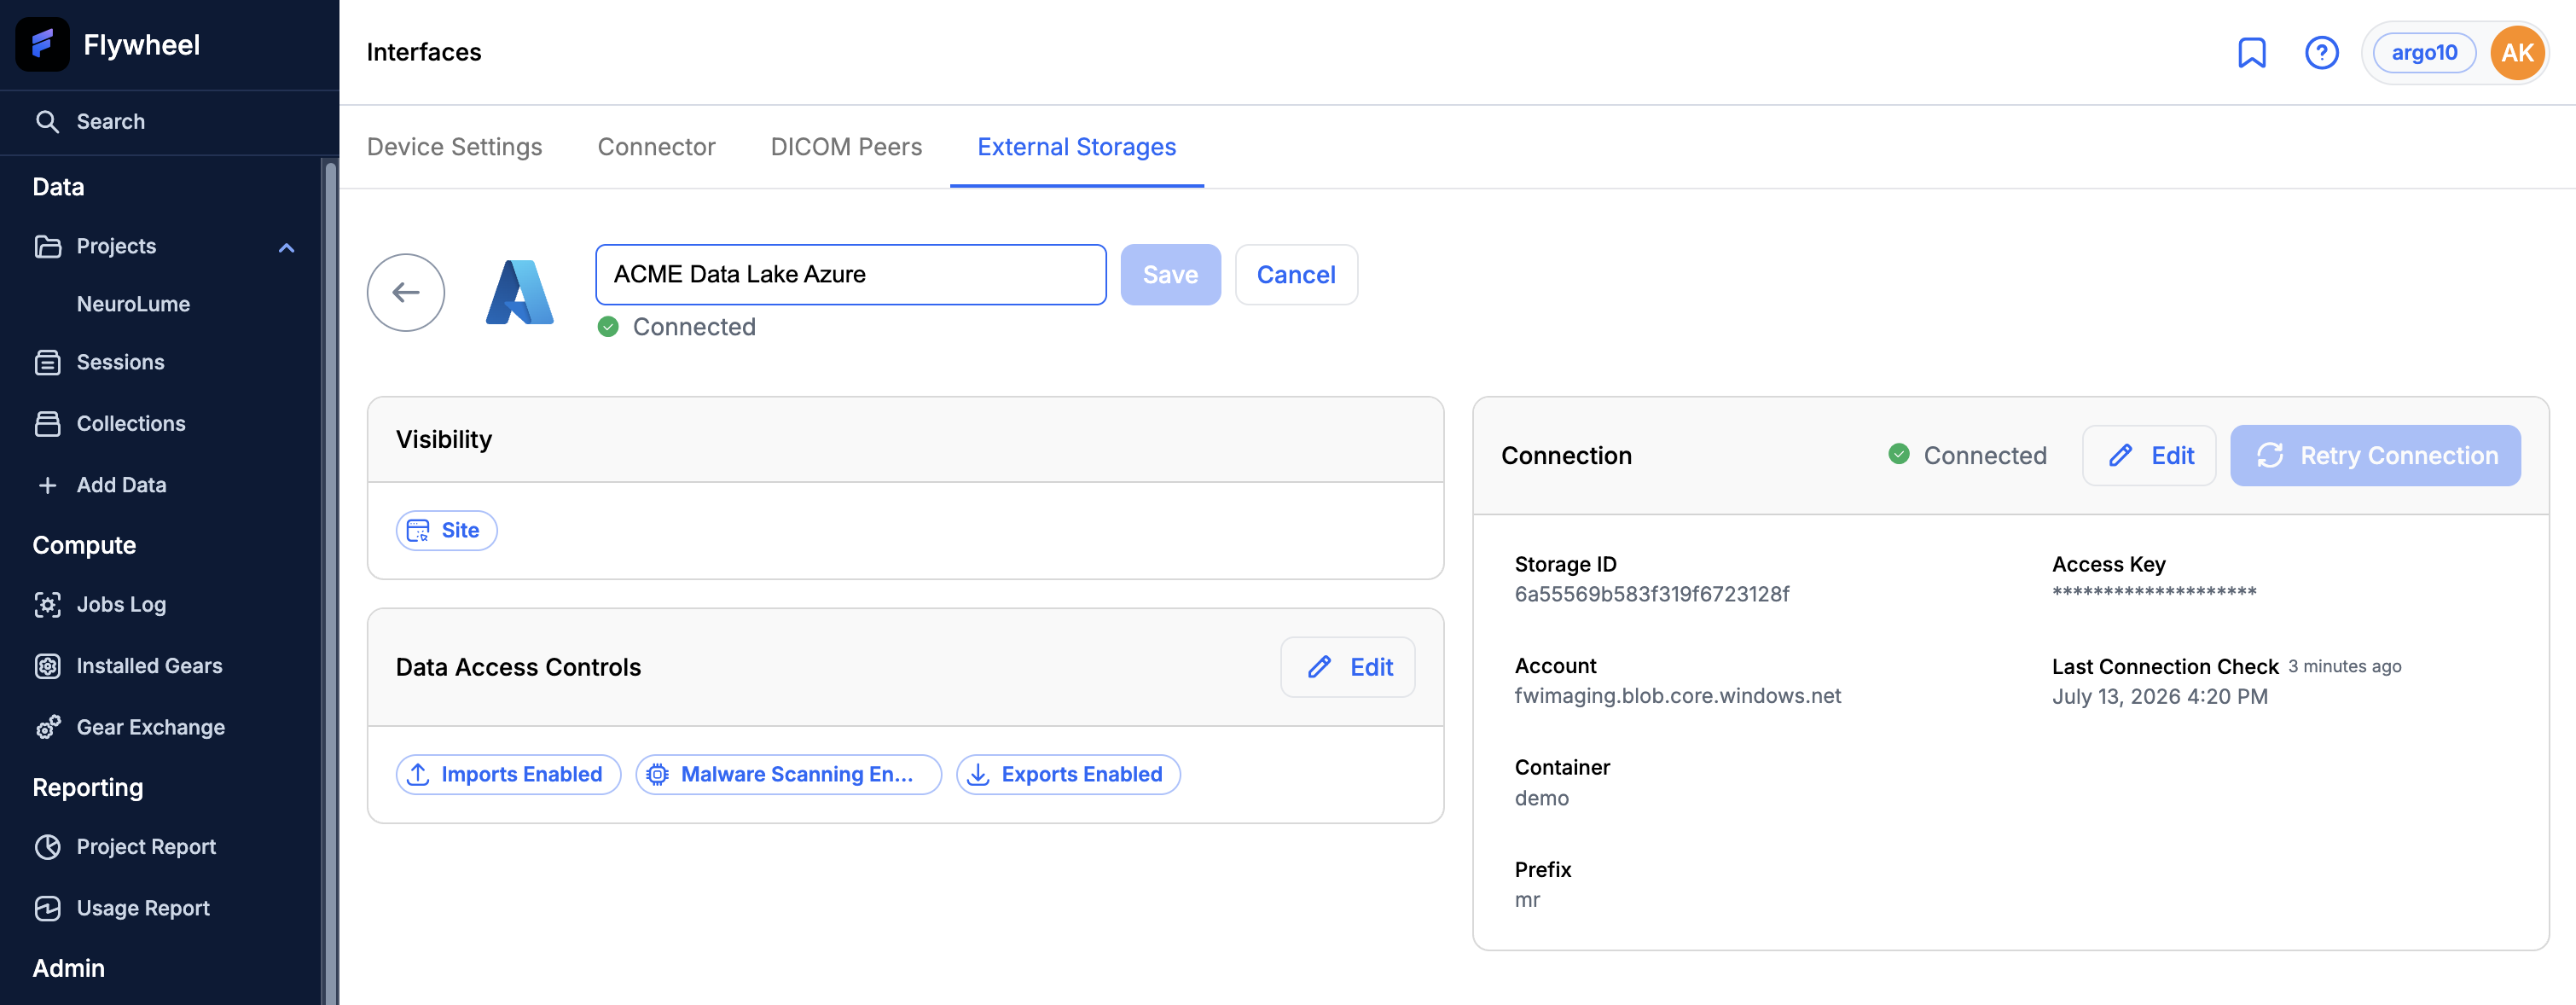
To rename the storage, click the pencil icon next to its name, edit the name, and click Save.
Edit Connection Details
To change the storage location, credentials, or credential source, click Edit on the Connection card.
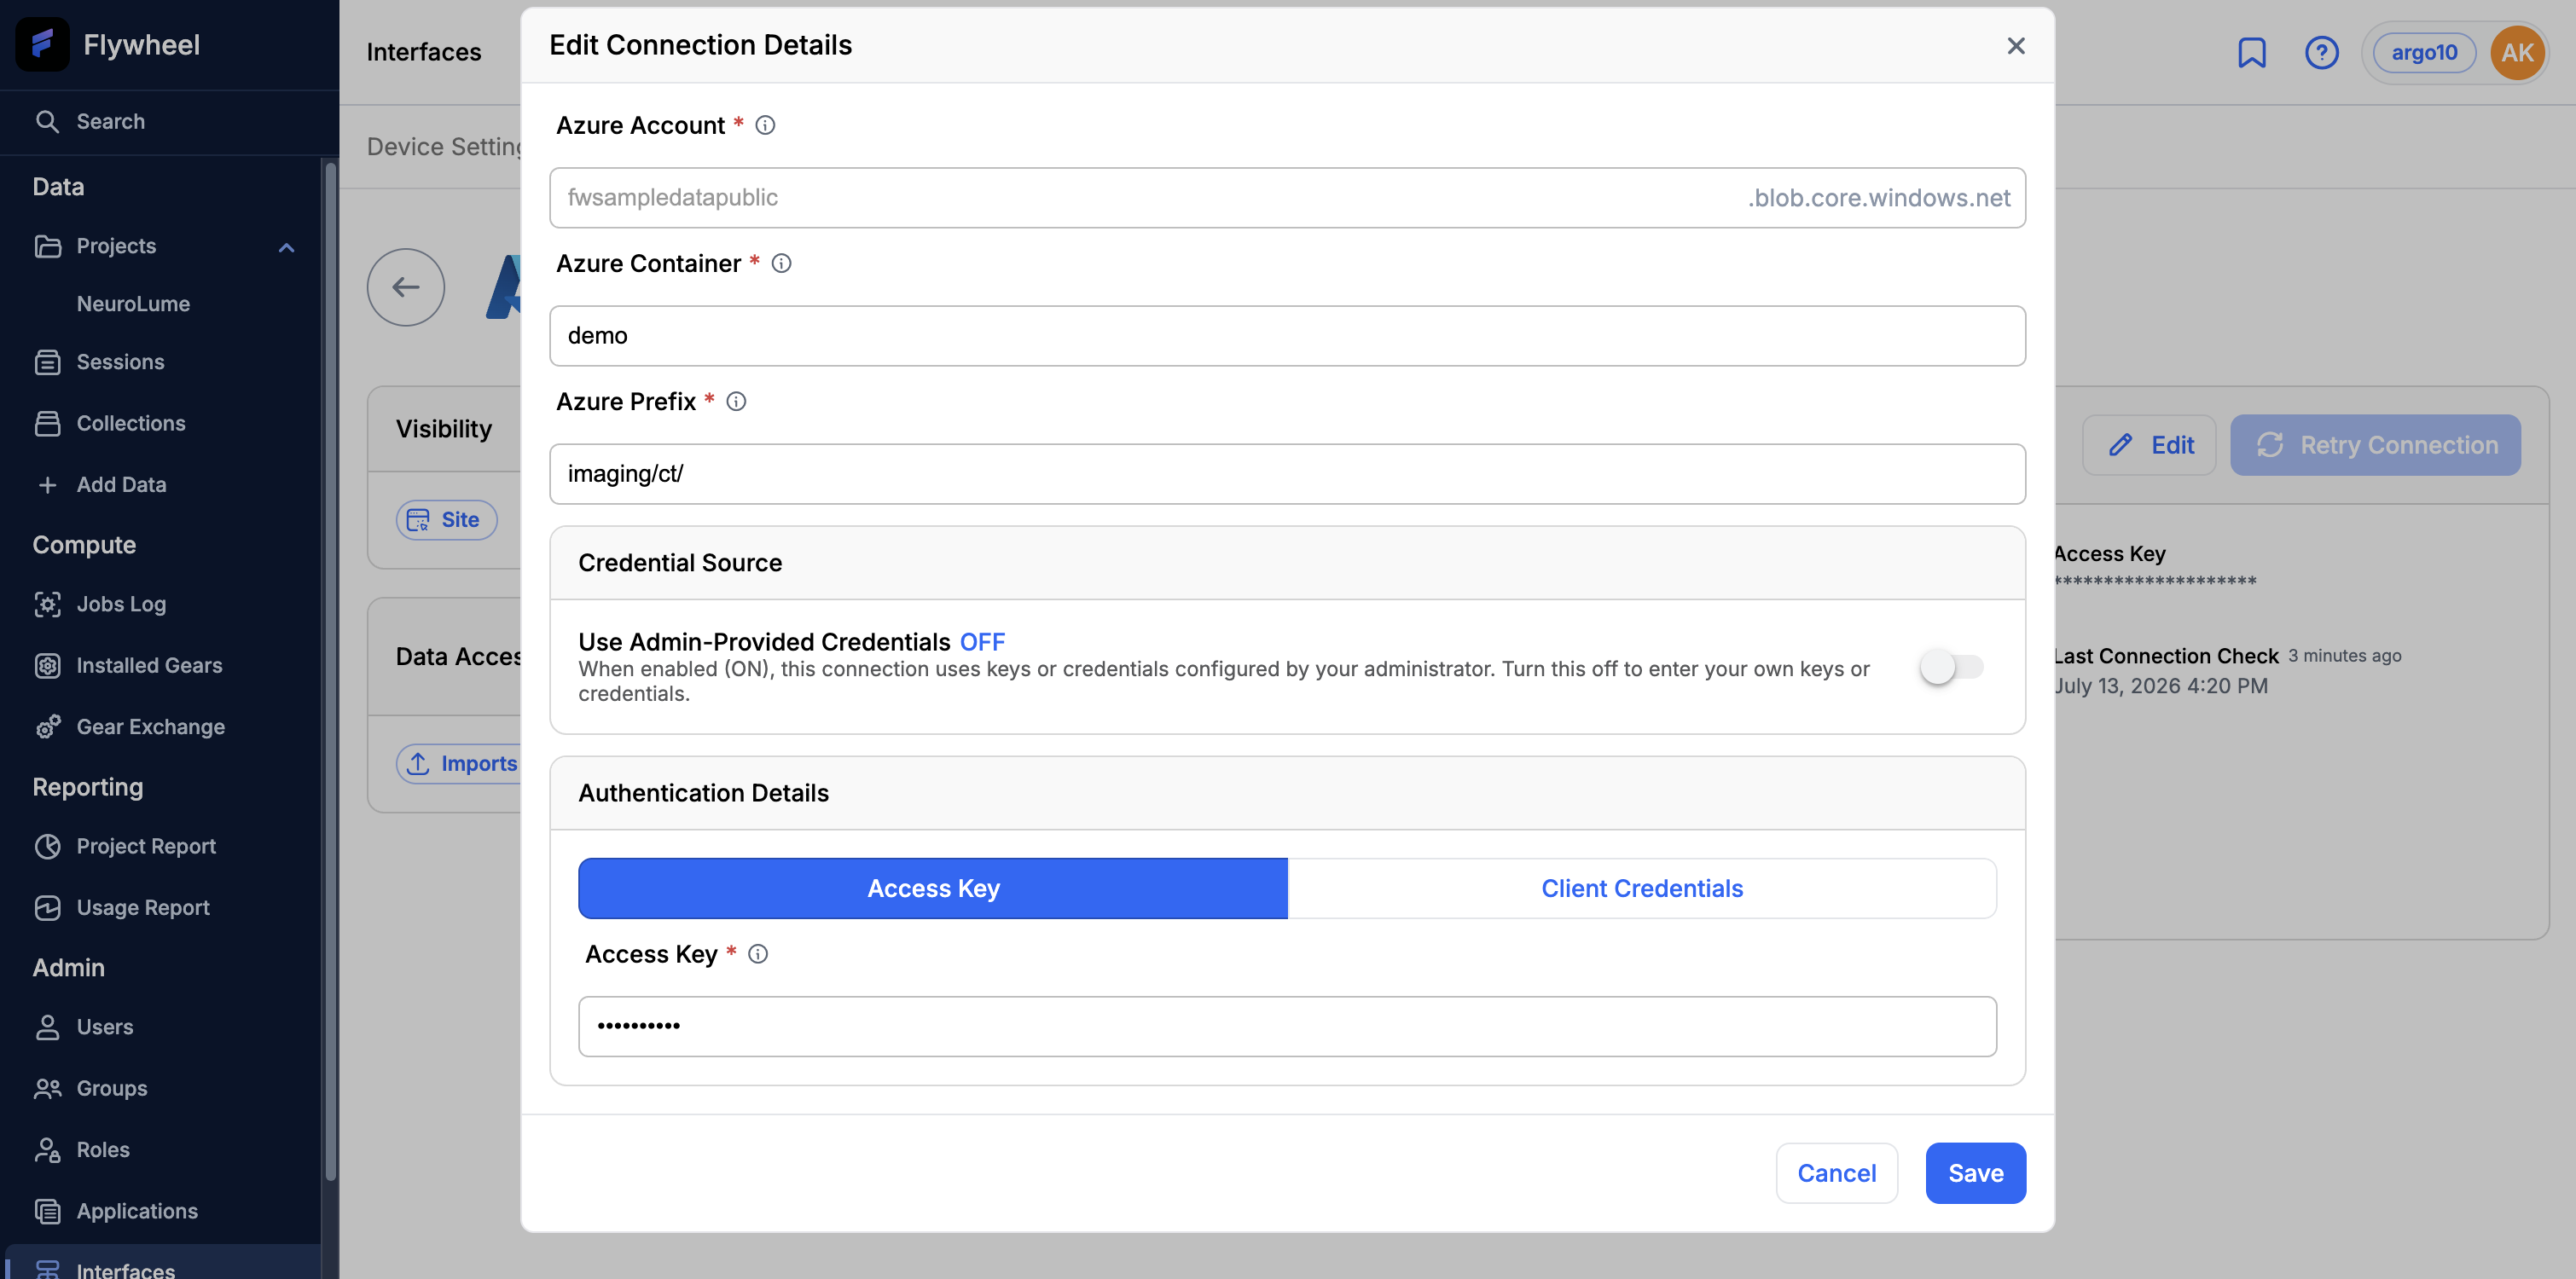
The bucket or account cannot be changed after creation
The bucket or account that an External Storage points to cannot be changed after the storage is created. This field is read-only when editing an existing External Storage, and its label depends on the provider: Amazon S3 Bucket for Amazon S3, Azure Account for Azure Blob Storage, and Google Bucket for Google Cloud Storage. To use a different bucket or account, create a new External Storage registration.
The Prefix (or Path) setting can be changed after creation from the Edit Connection Details dialog.
Delete an External Storage
Open the overflow menu (the three dots) on the storage's row and select Delete Storage Provider.
Registering Storage via the CLI
External Storage registrations can also be created or updated using the New CLI (flyw). The CLI accepts both absolute and relative paths when registering or updating storage providers.
For complete command syntax, refer to the flyw CLI documentation.
Troubleshooting
An unsuccessful connection test is likely due to one of the following reasons:
- The bucket or account does not exist
- The access keys are no longer valid