Manage Connections
The Manage Connections page is where Site Administrators authorize the imaging devices that may send to the Flywheel-hosted DICOM Push connector, share the connector's own certificate, and monitor incoming activity. This guide walks through each task in the Flywheel web app.
Applies to Flywheel-hosted DICOM Push
These steps apply to DICOM Push, the Flywheel-hosted DICOM receiver introduced in Flywheel 22.2, which receives DICOM over the public internet and secures it with mutual TLS. For an overview, see the DICOM Connector.
Before you begin
- DICOM Push must be enabled for your site. If it is not, contact Flywheel Support.
- You need Site Administrator access to the Flywheel web app.
- For each device you plan to authorize, collect its public certificate, the hostname or IP it connects from (as Flywheel sees it — your public or egress address if you use NAT), and its Application Entity Title (AET). See DICOM Push Connectivity Requirements for how to gather these.
Open the Manage Connections page
- In the Flywheel web app, go to Interfaces → Connector to open Connector Details.
- Select Manage Connections.
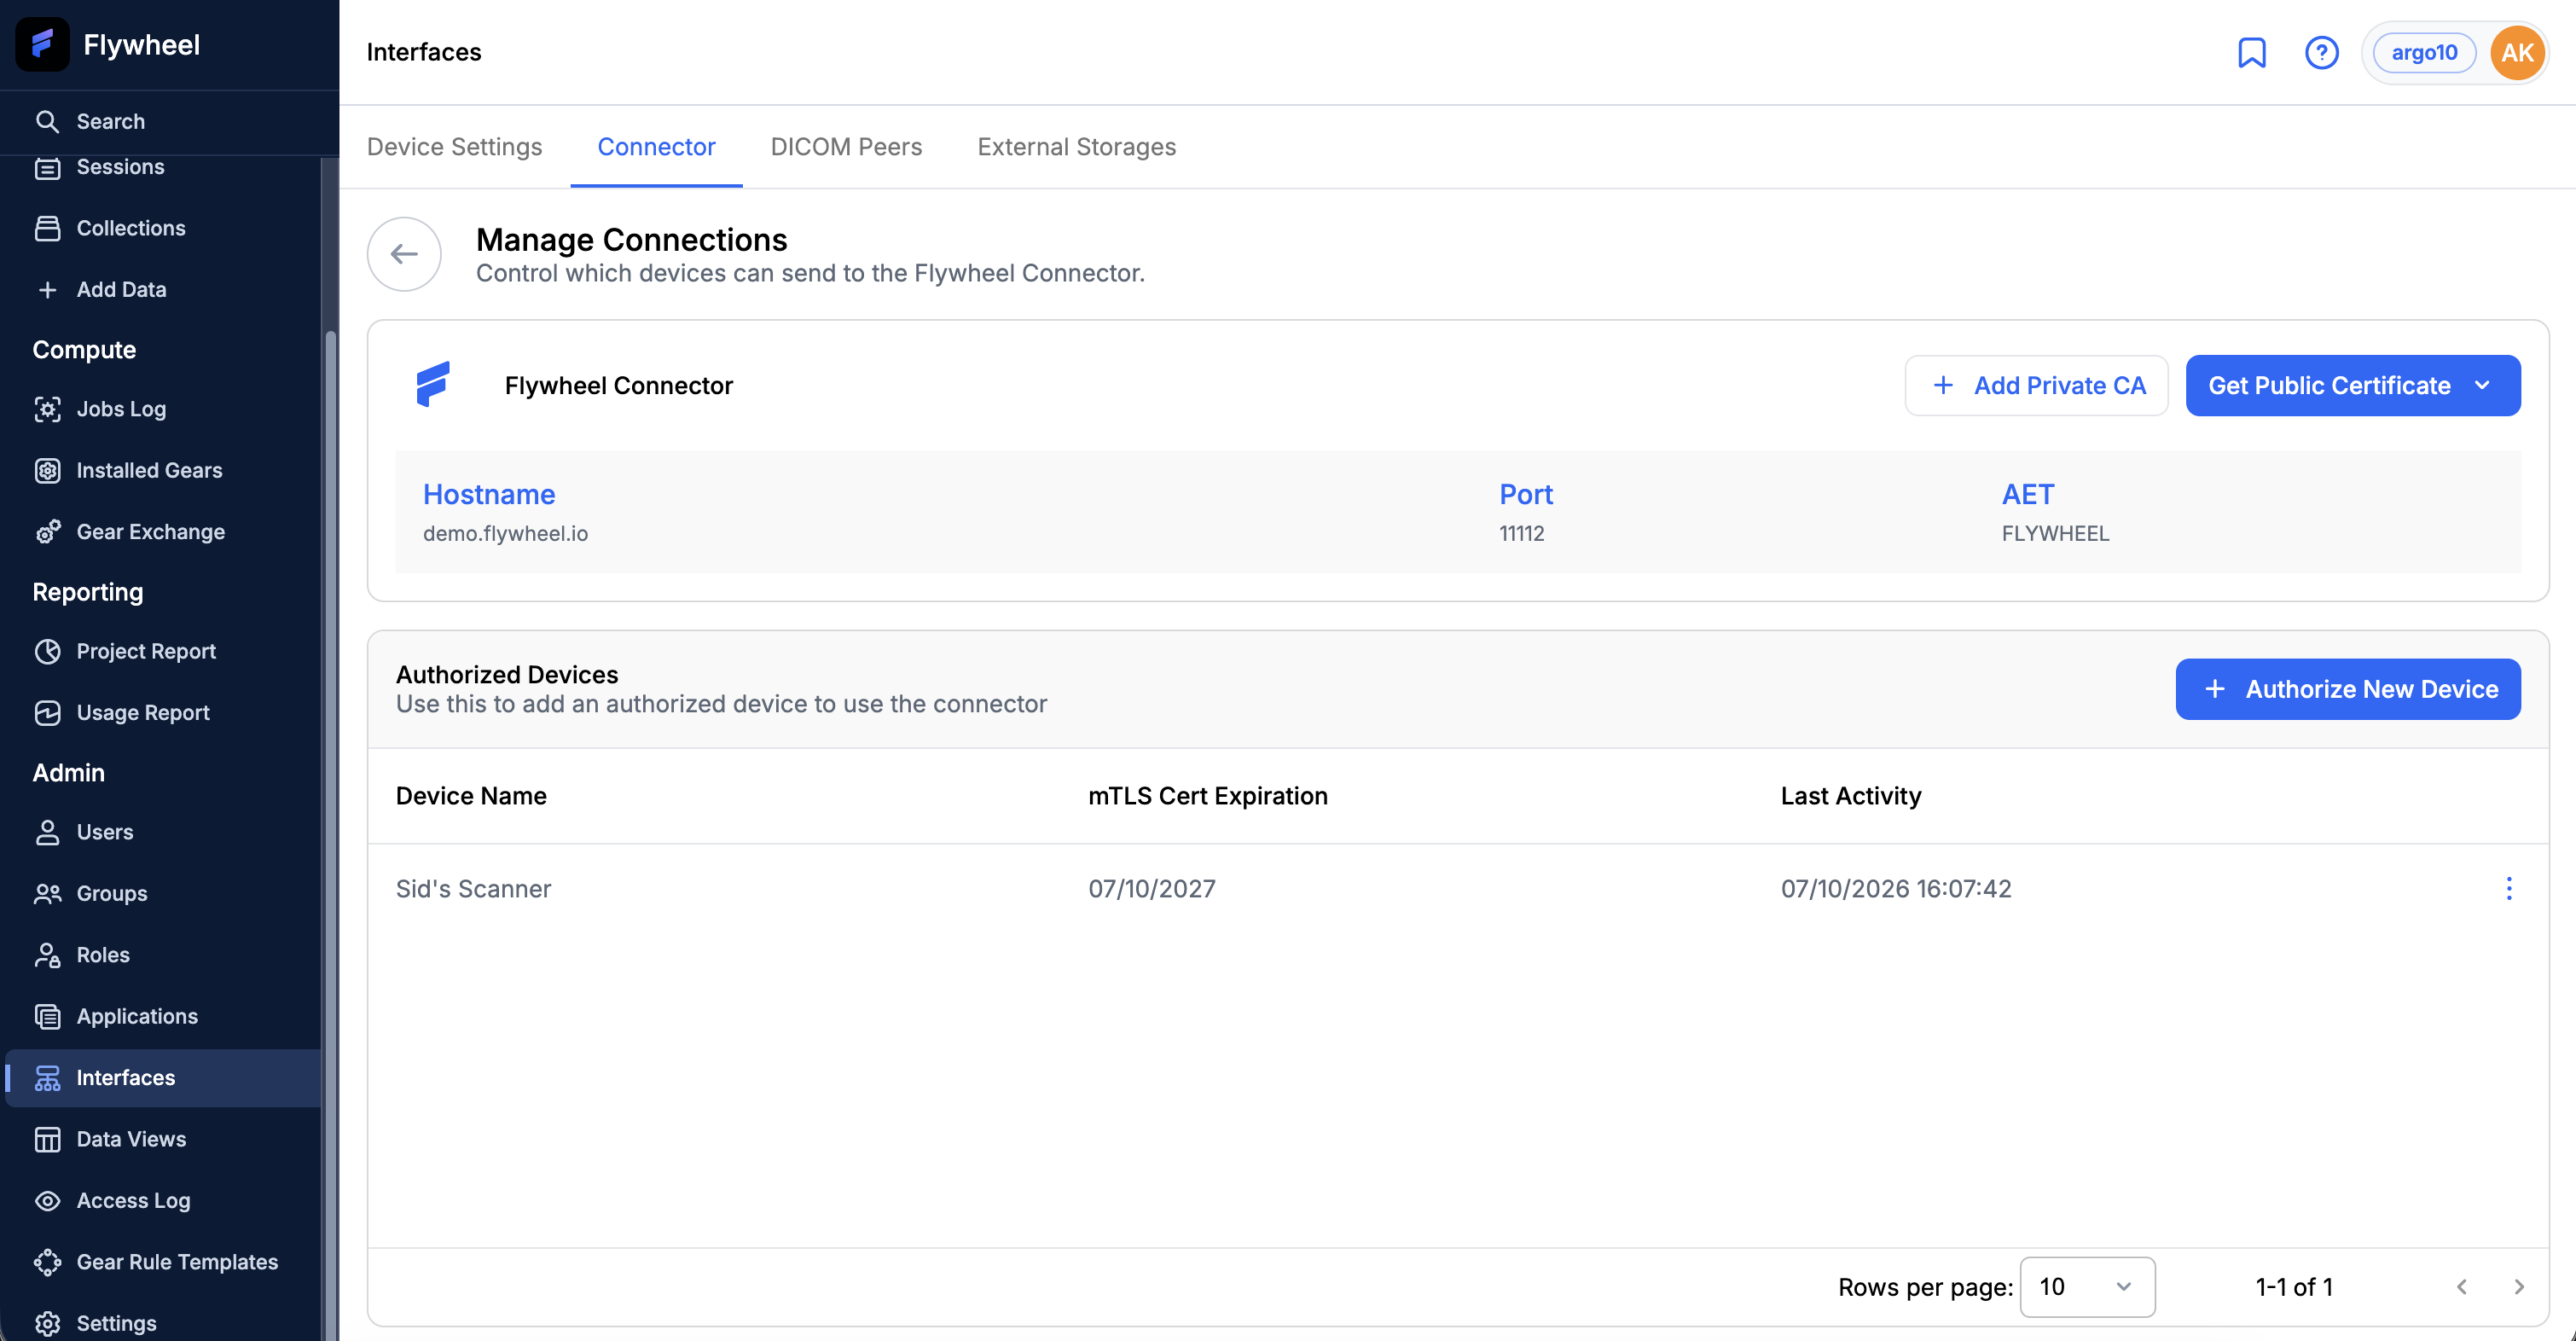
The top of the page identifies the Flywheel Connector — its Hostname, Port, and AET — which the sending side uses as the DICOM destination. Below it, Authorized Devices lists each device that is allowed to send, with its mTLS Cert Expiration and Last Activity.
Share the connector's public certificate
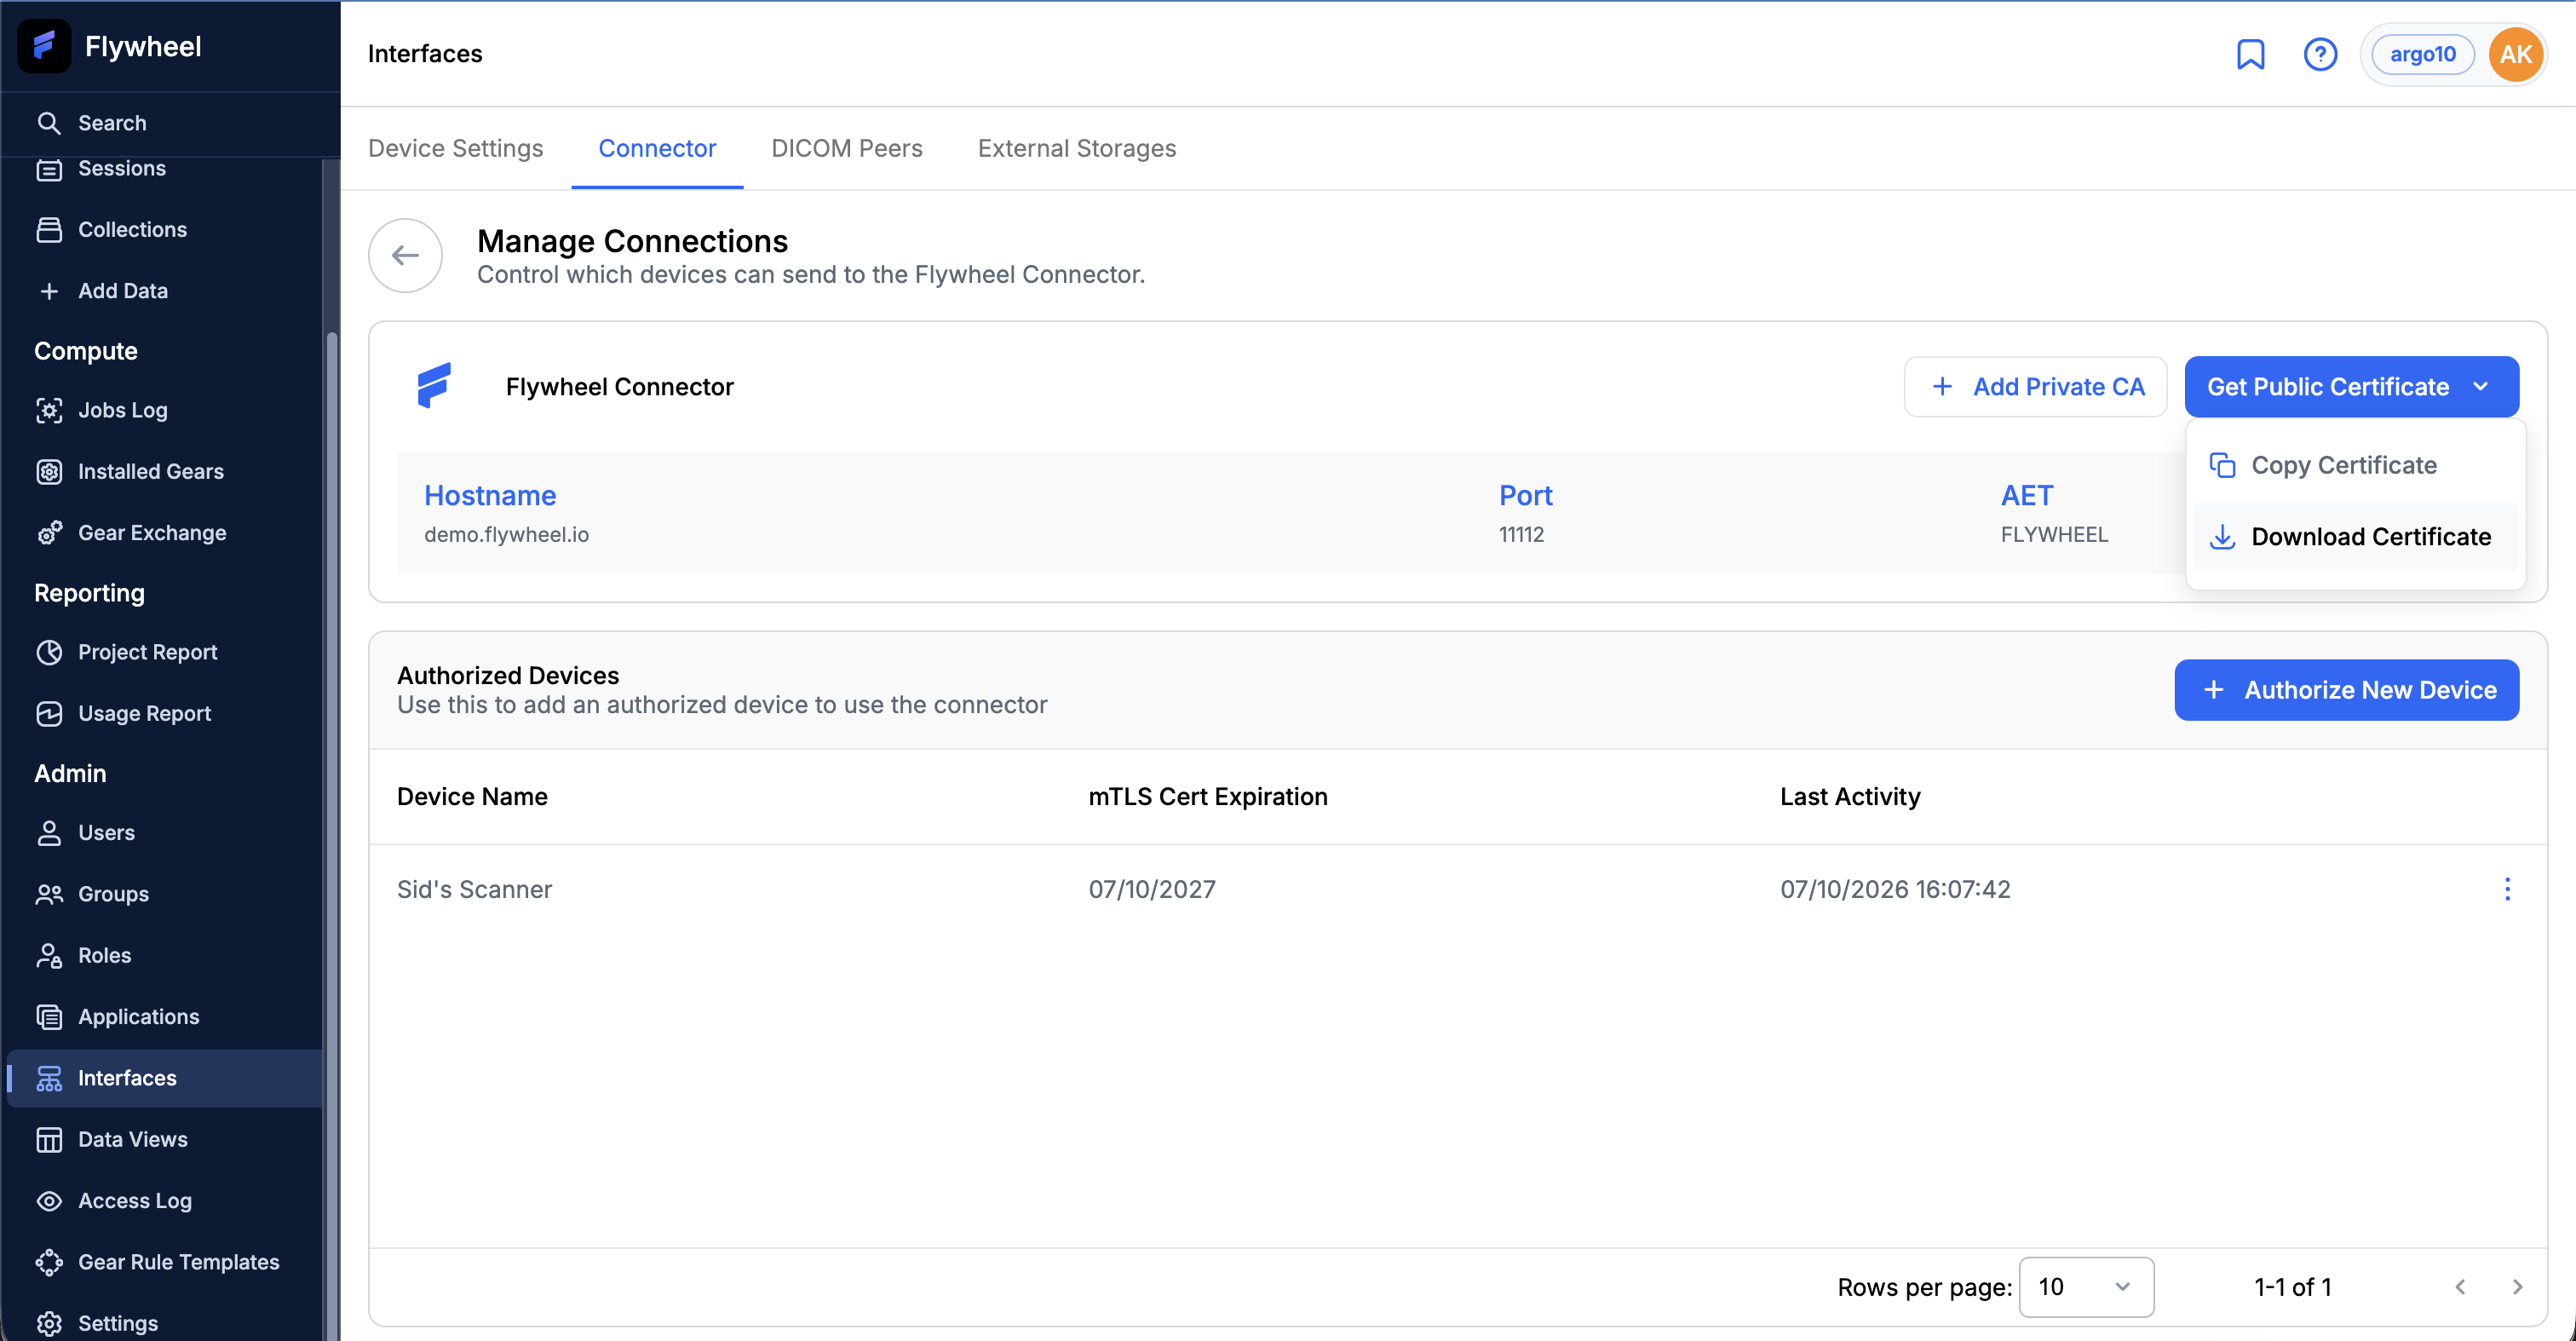
With mutual TLS, the sending side also verifies Flywheel's identity, so it needs the connector's public certificate. Select Get Public Certificate, then choose Copy Certificate or Download Certificate, and provide it to whoever configures the device or appliance.
Authorize a device
Each device is authorized individually — trust is anchored to that device's certificate, not to whoever issued it. See Secure Connections (Mutual TLS) for the authorization model.
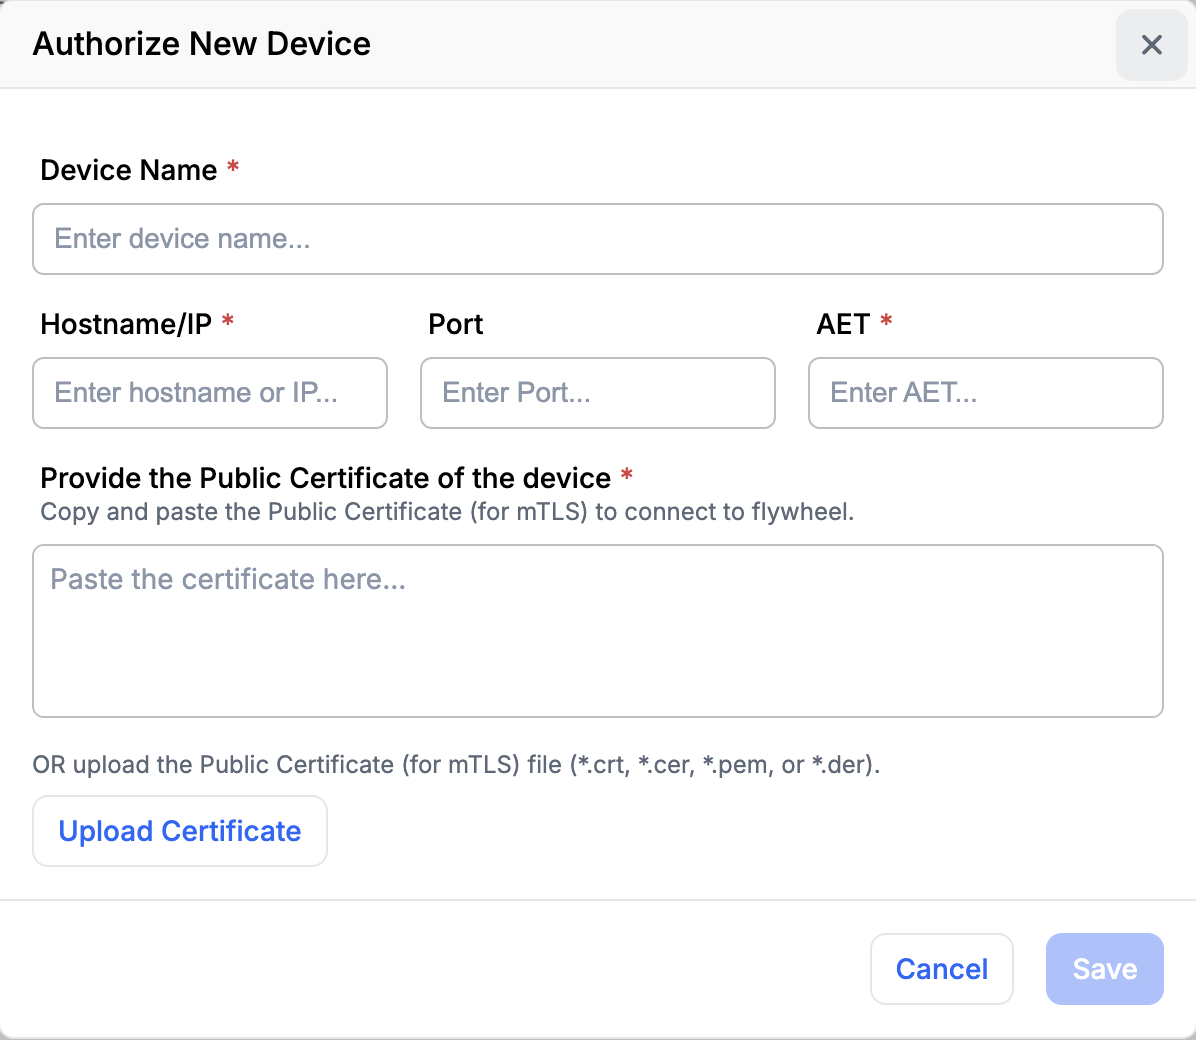
- Select Authorize New Device.
- Enter a Device Name, the Hostname/IP the device connects from, and its AET. Port is optional.
- Under Provide the Public Certificate of the device, paste the certificate, or select Upload Certificate to load a certificate file (
.crt,.cer,.pem, or.der). - Select Save.
Register the endpoint that actually connects
If a proxy or gateway makes the connection on the device's behalf, register the appliance's certificate, hostname or IP, and AET — not those of the device sitting behind it.
Add a private certificate authority (optional)
If your devices use privately-issued certificates, you can add your private certificate authority (CA) so Flywheel can validate them — for example, confirming the certificate chain and expiry.
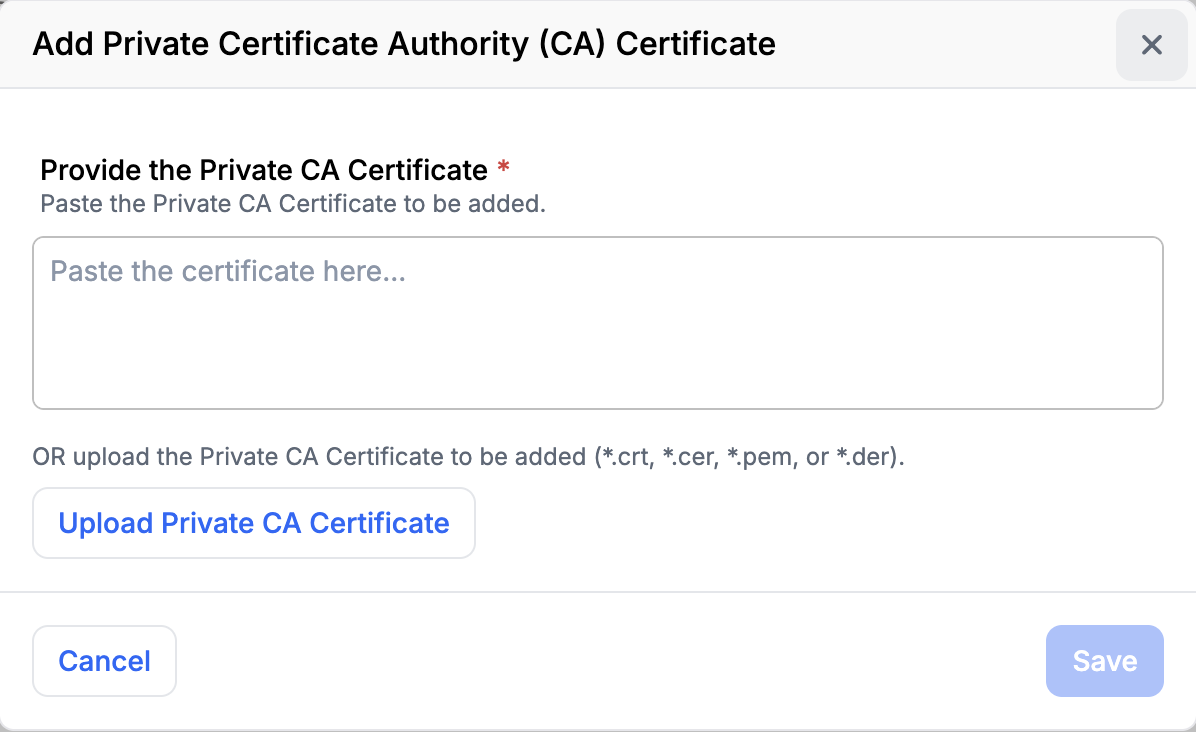
- Select Add Private CA.
- Paste the CA certificate, or select Upload Private CA Certificate to load a file (
.crt,.cer,.pem, or.der). - Select Save.
A private CA validates certificates; it does not authorize them
Adding a CA does not authorize every certificate that CA issues. Each device is still authorized individually by its own registered certificate. See Secure Connections (Mutual TLS).
Monitor connector activity
DICOM Push builds on Flywheel's Bulk Import. The connector handles the DICOM-specific receiving, then launches a standard import to route each received study into its destination project — one import job per study.
Connector Details lists recent Connector Activity from the connector's point of view, so it is the best place to confirm that expected studies have arrived. It includes studies that have been received but not yet imported, and it reflects the success or failure of each study's import. Each row shows the Started At time, the Status, the sending Device, the Study Description, and the Destination Project and Group.
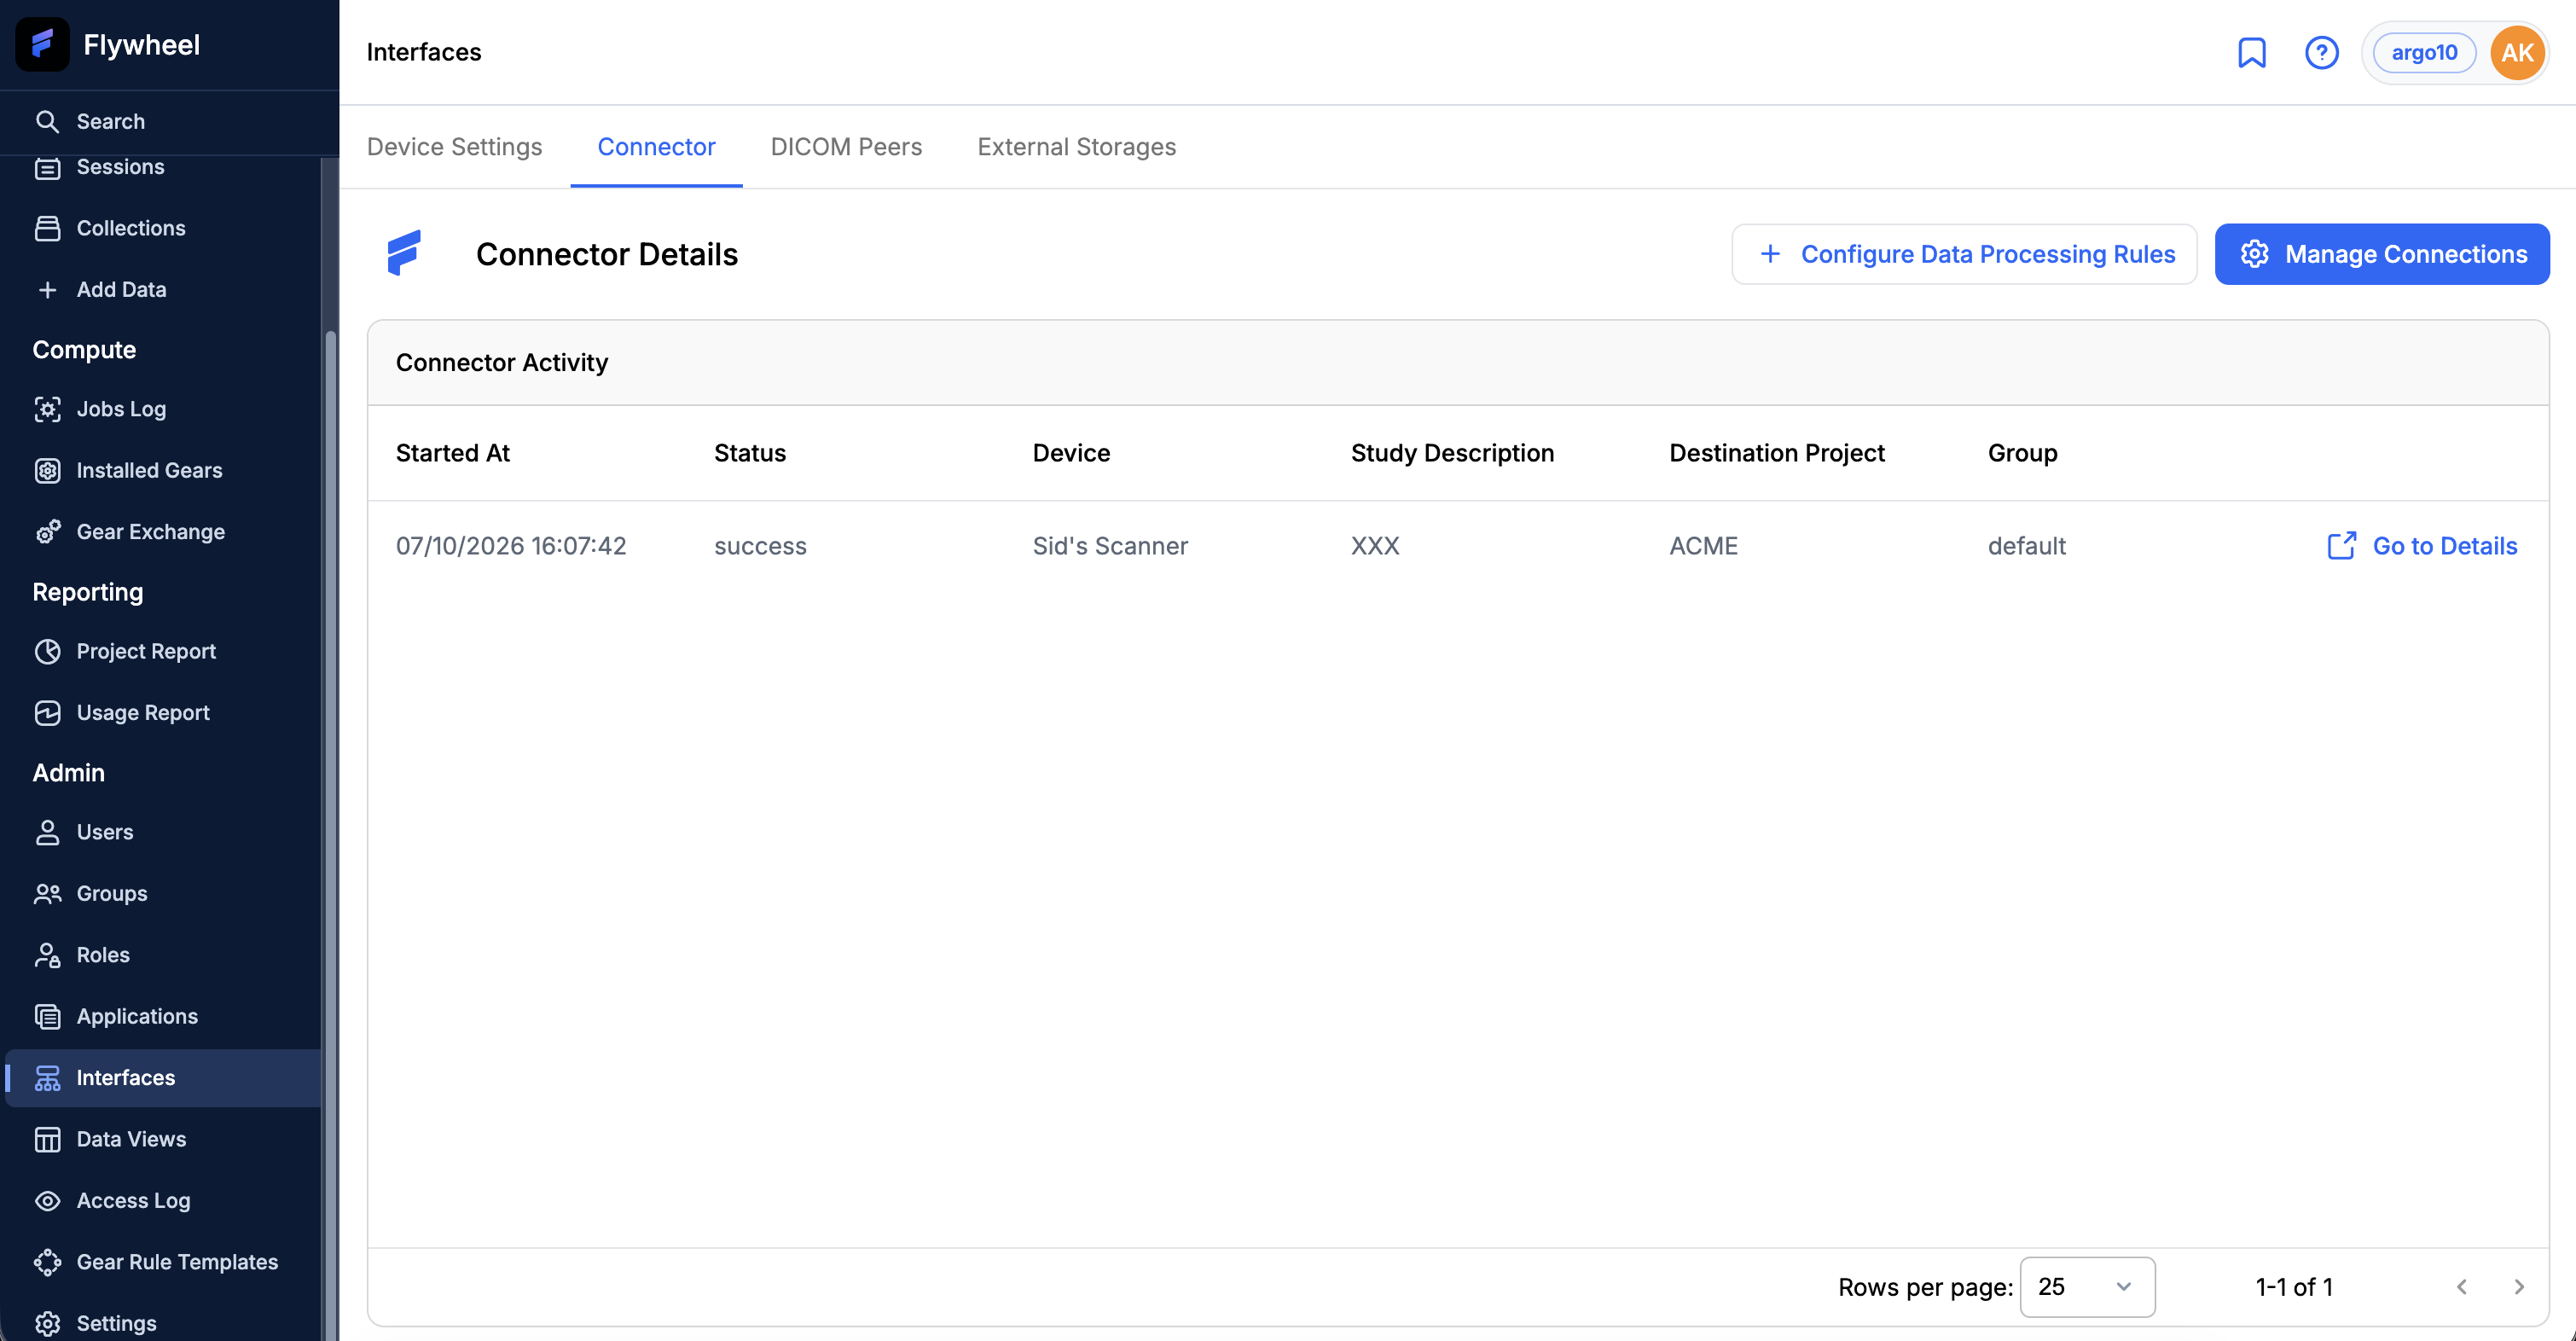
Select Go to Details on a row to open that study's import job in its destination project. The import job covers the import step — de-identification, malware scanning, grouping and zipping, upload to Flywheel Core, and conflict handling — and gives a more detailed view of that stage.
Where to look
In normal operation, received data flows straight through and appears in Flywheel Core, and in the destination project's Imports list, without any action on this page. You generally only need Connector Activity when a study seems to be missing. Together, the two views trace each study end to end, from arrival at the connector through import.
Related pages
- DICOM Push Connectivity Requirements — what your devices or appliances must support.
- Secure Connections (Mutual TLS) — how Flywheel authenticates each device.
- DICOM Connector — overview of the modern connector and DICOM Push.