Adding Attachments
This article describes how to upload single files to the following locations in Flywheel. These methods should not be used for imaging files; attachments should be other types of files for your project like subjects list, survey questions, etc. You can add attachment to the:
Unsupported upload method for site, group, or project de-id profiles
Using the methods in this article will not de-identify data. Use one of these supported methods if you use site, group, or project de-id profiles.
Attach to a Project
To upload a file that would be an attachment at the project level:
- Select a project,
- Click the Information tab,
- Go to the Attachments section, and
- Click Upload Attachment.
The file appears in the list of attachments.

You can also attach files to a project in the details view:
- Select a Project,
- From Sessions,
- Click Project, and
- Click Upload Attachment.

Attach to a Subject
- Select a project,
- From Sessions,
- Select a subject,
- Select the Subject tab,
- Click Upload Attachment.
The file is uploaded to the subject and appears in the Attachments list.

Attach to a Session
- Select a project,
- Select the Sessions tab, and
- Click Upload Attachment.
The file is uploaded to the session and appears in the Attachments list.

Upload an Acquisition
You can also create a new acquisition and upload data to the acquisitions level of the Flywheel hierarchy. These files will be uploaded as acquisitions and not attachments.
Note
Use Bulk Import if you have DICOM images.
- Select a project.
- Click the Sessions tab, then click into a Session and select the Acquisitions tab.
-
To create a new Acquisition and upload data to it, follow this step. Otherwise, skip to step 4.
-
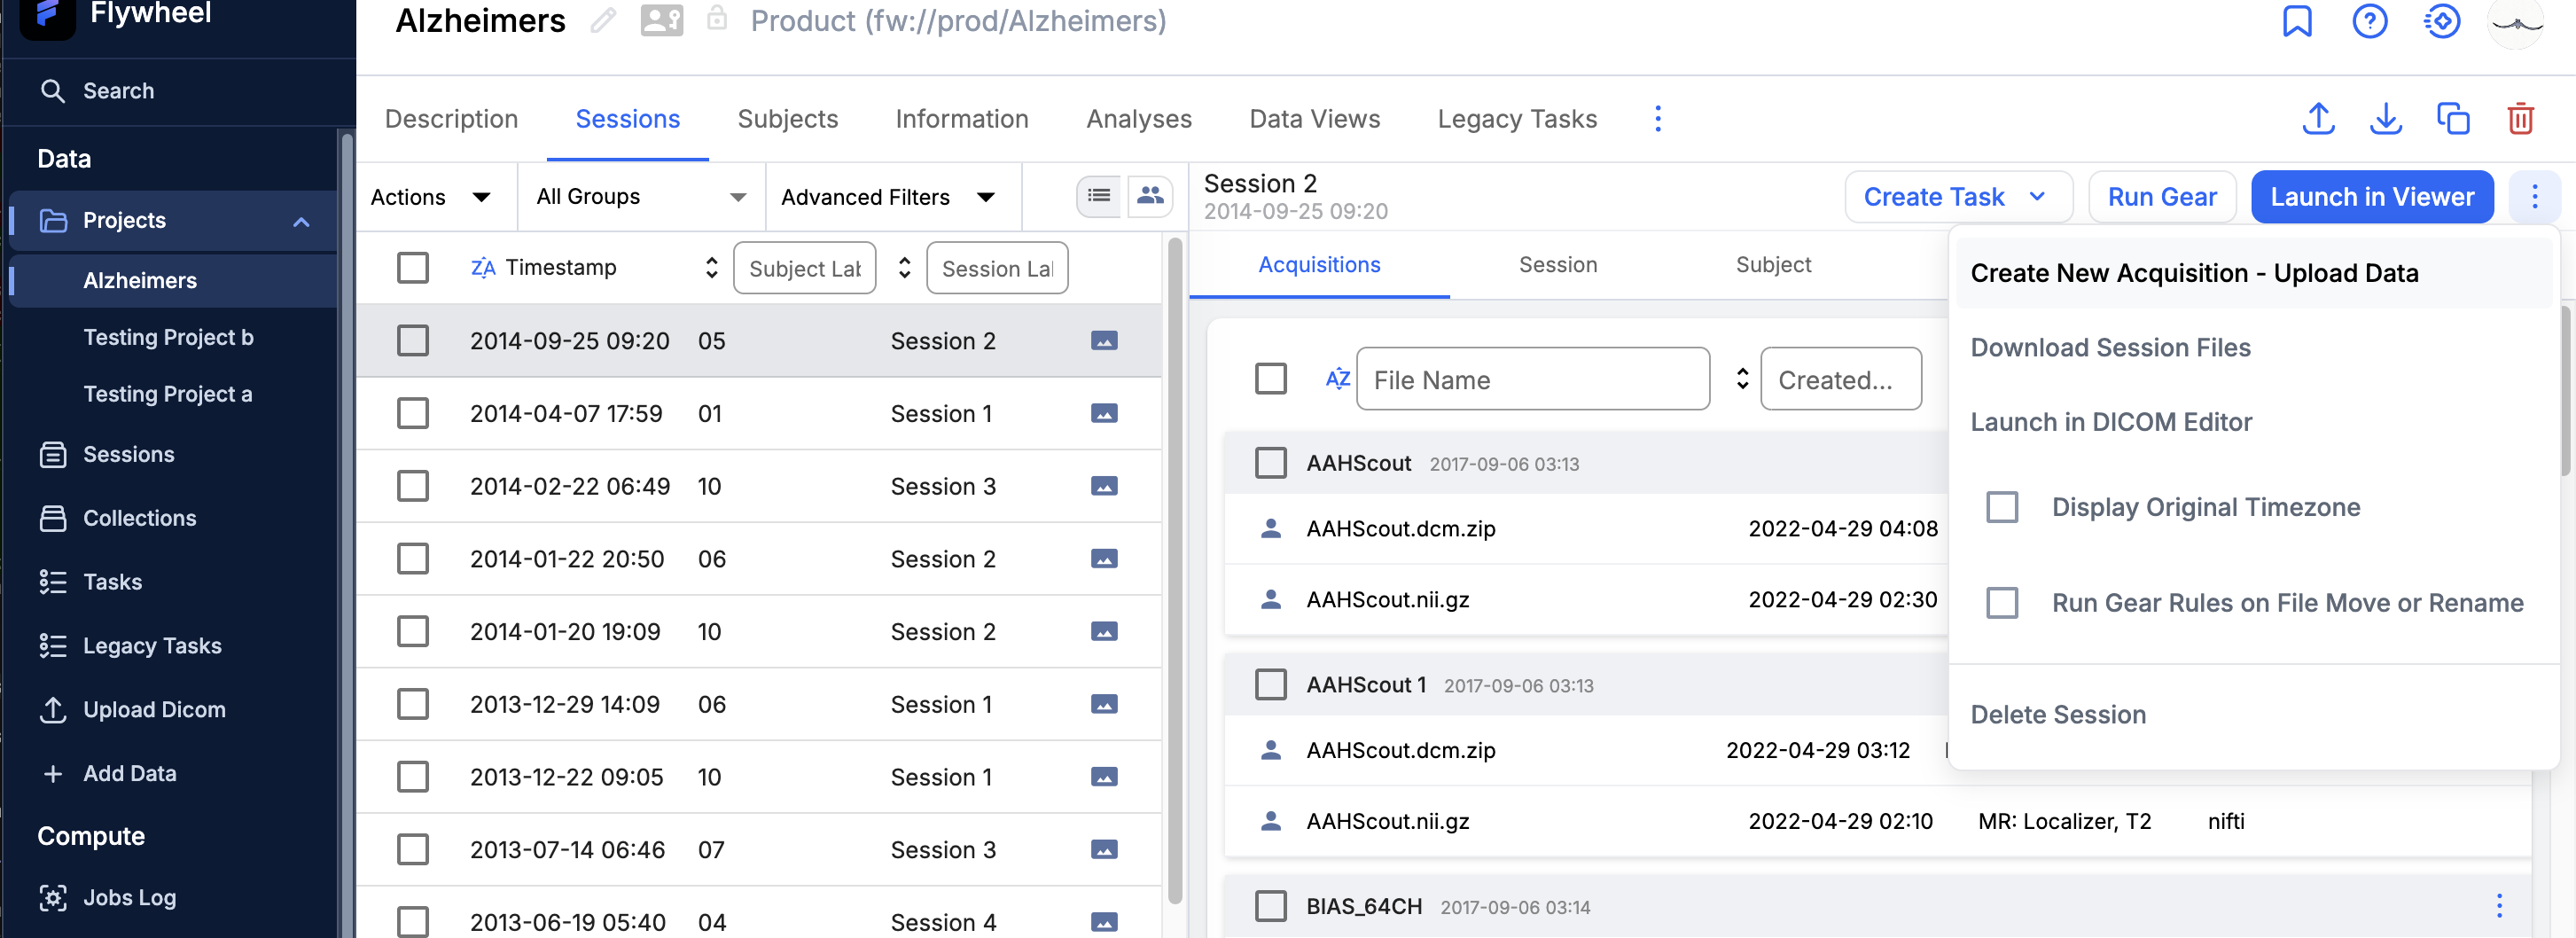
Open the Session's options menu and click Create New Acquisition - Upload Data.
-
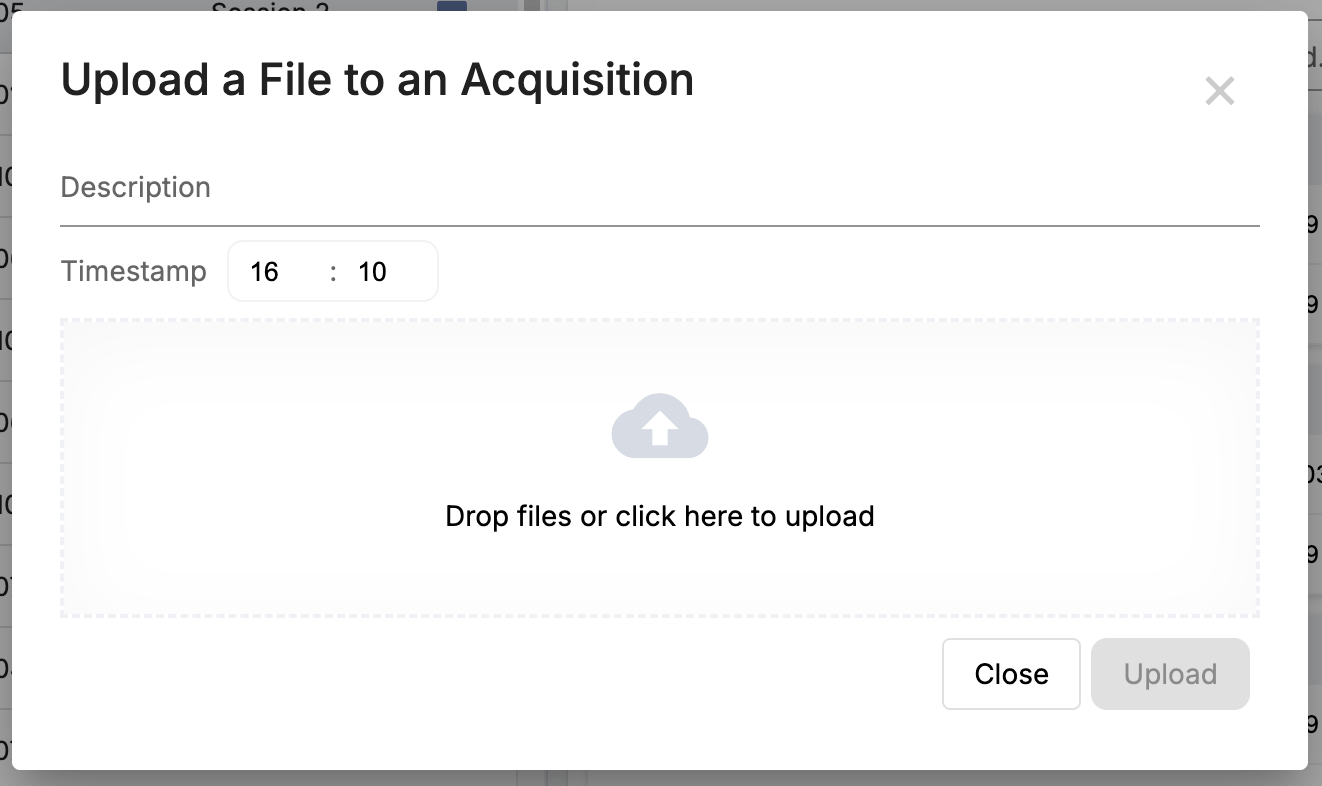
Add a Description and Timestamp, then drag files to the drop target or click anywhere on the drop target to launch the file selector.
-
Click Upload.
-
-
To upload data to an existing Acquisition, follow this step.
-
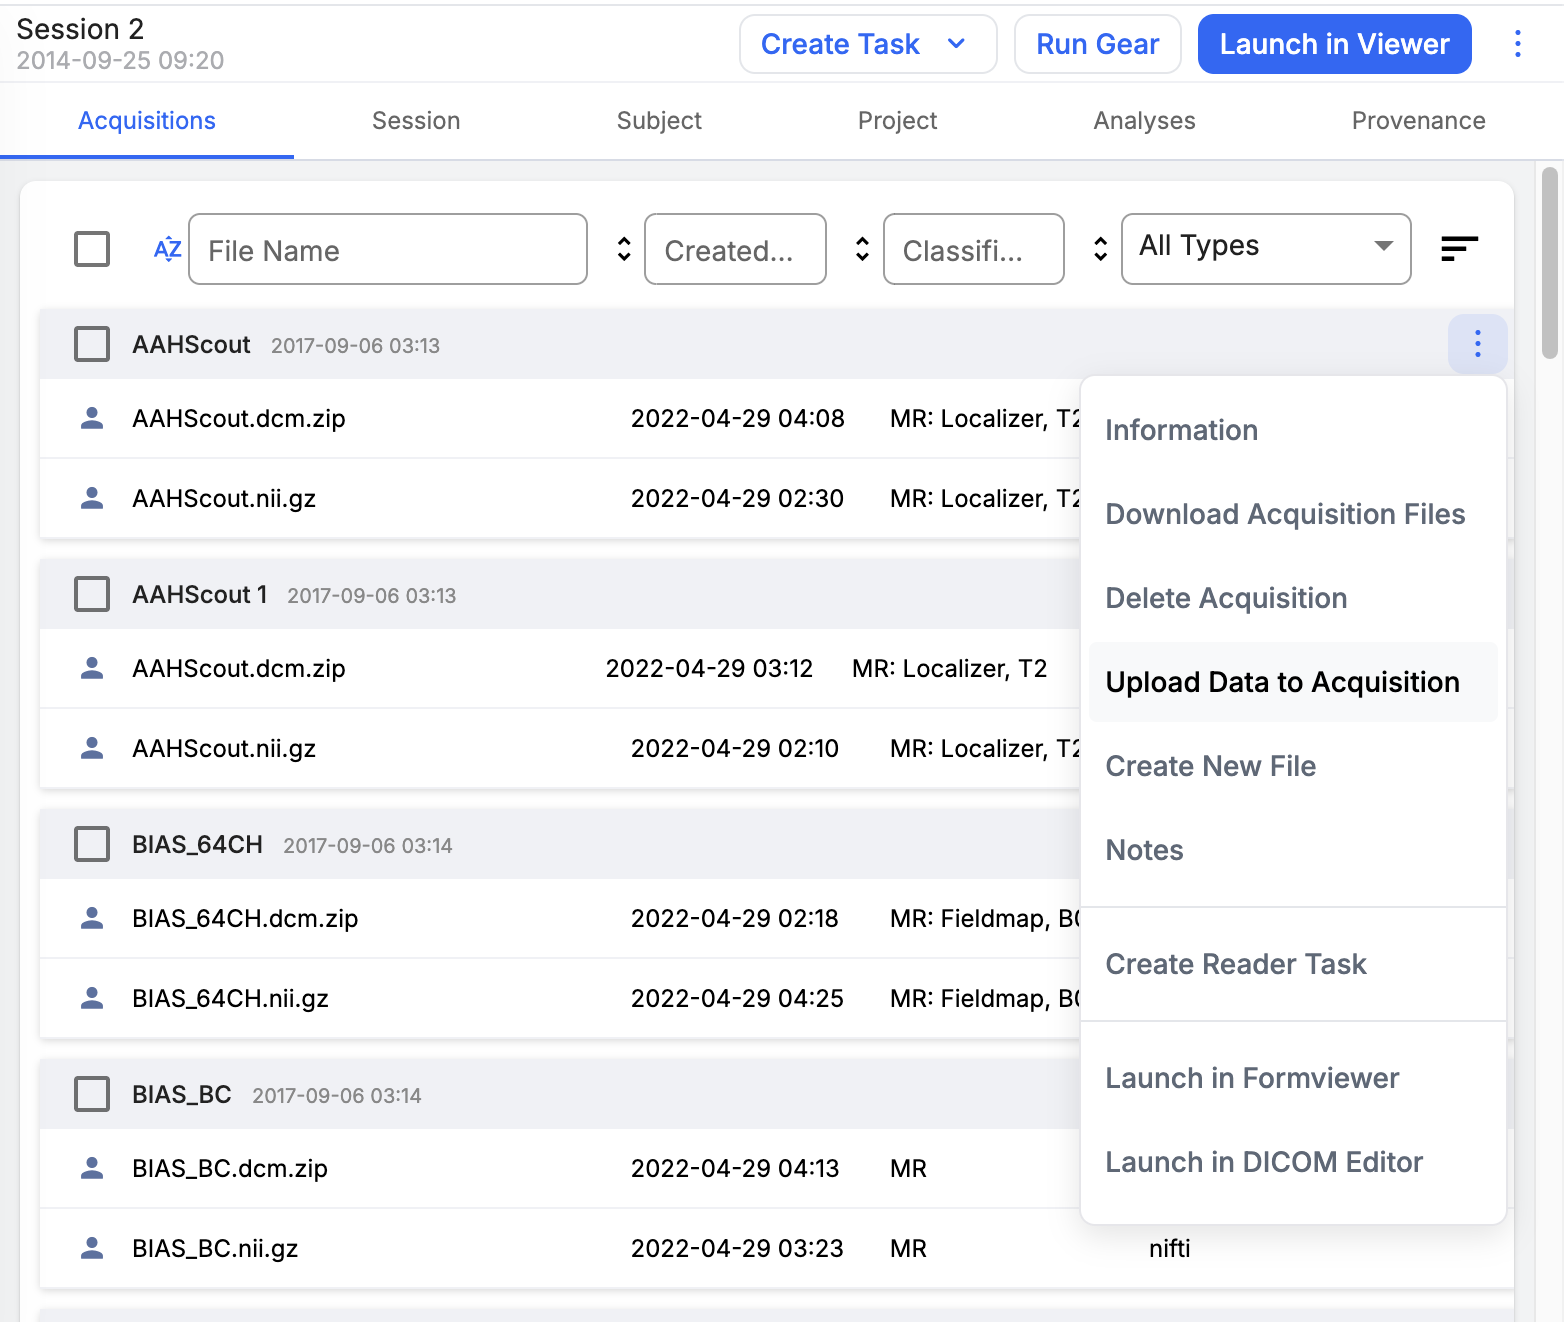
Open the Acquisition's options menu and click Upload Data to Acquisition.
-
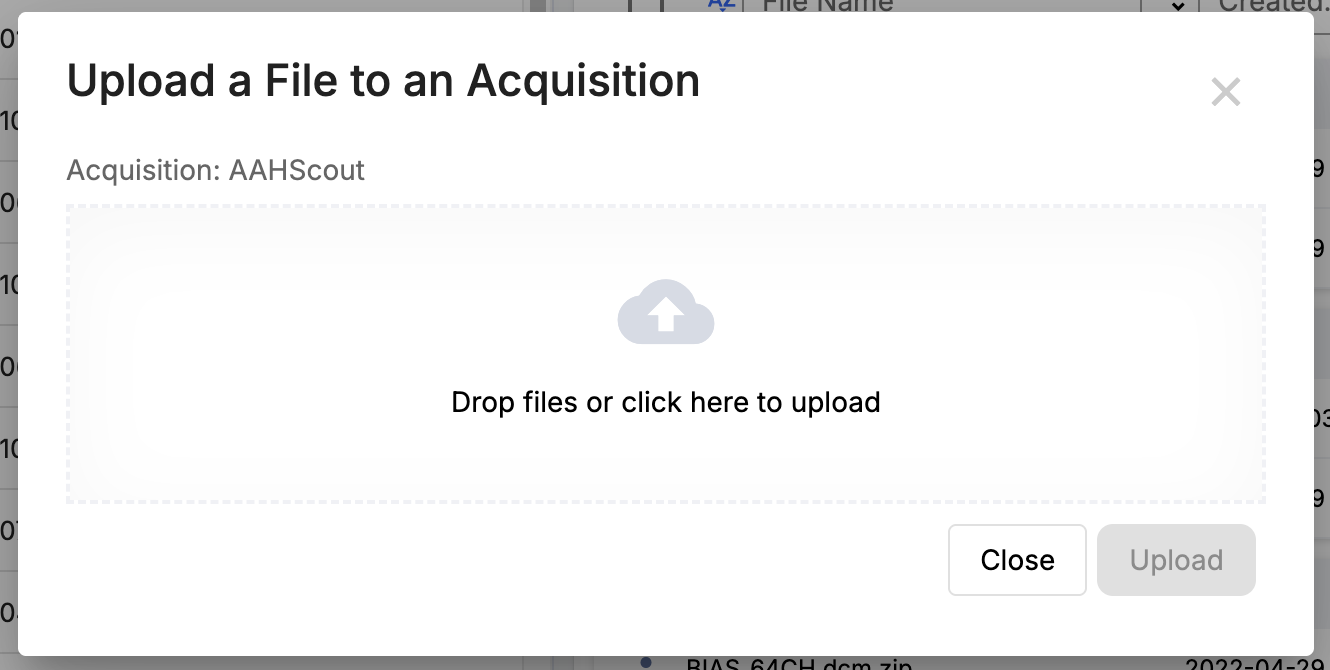
Drag files to the drop target or click anywhere on the drop target to launch the file selector.
-
Click Upload.
-
Use the Flywheel CLI
The fw upload command can be used to upload files to different locations in Flywheel.
-
Use the following command:
fw upload [File to upload] [Destination Path] -
Modify the destination path according to the location where the file needs to be attached.
For Example, to upload license.txt file as attachment to the project "Amygdala_Structure", the command would be:
fw upload license.txt "fw://ce-team/Amygdala_Structure"